Saturday, July 16, 2022

Zombicide Invader - Special Room Models


Floor tiles from the Zombicide Invader core box include a couple room types that allow characters to take special actions.  

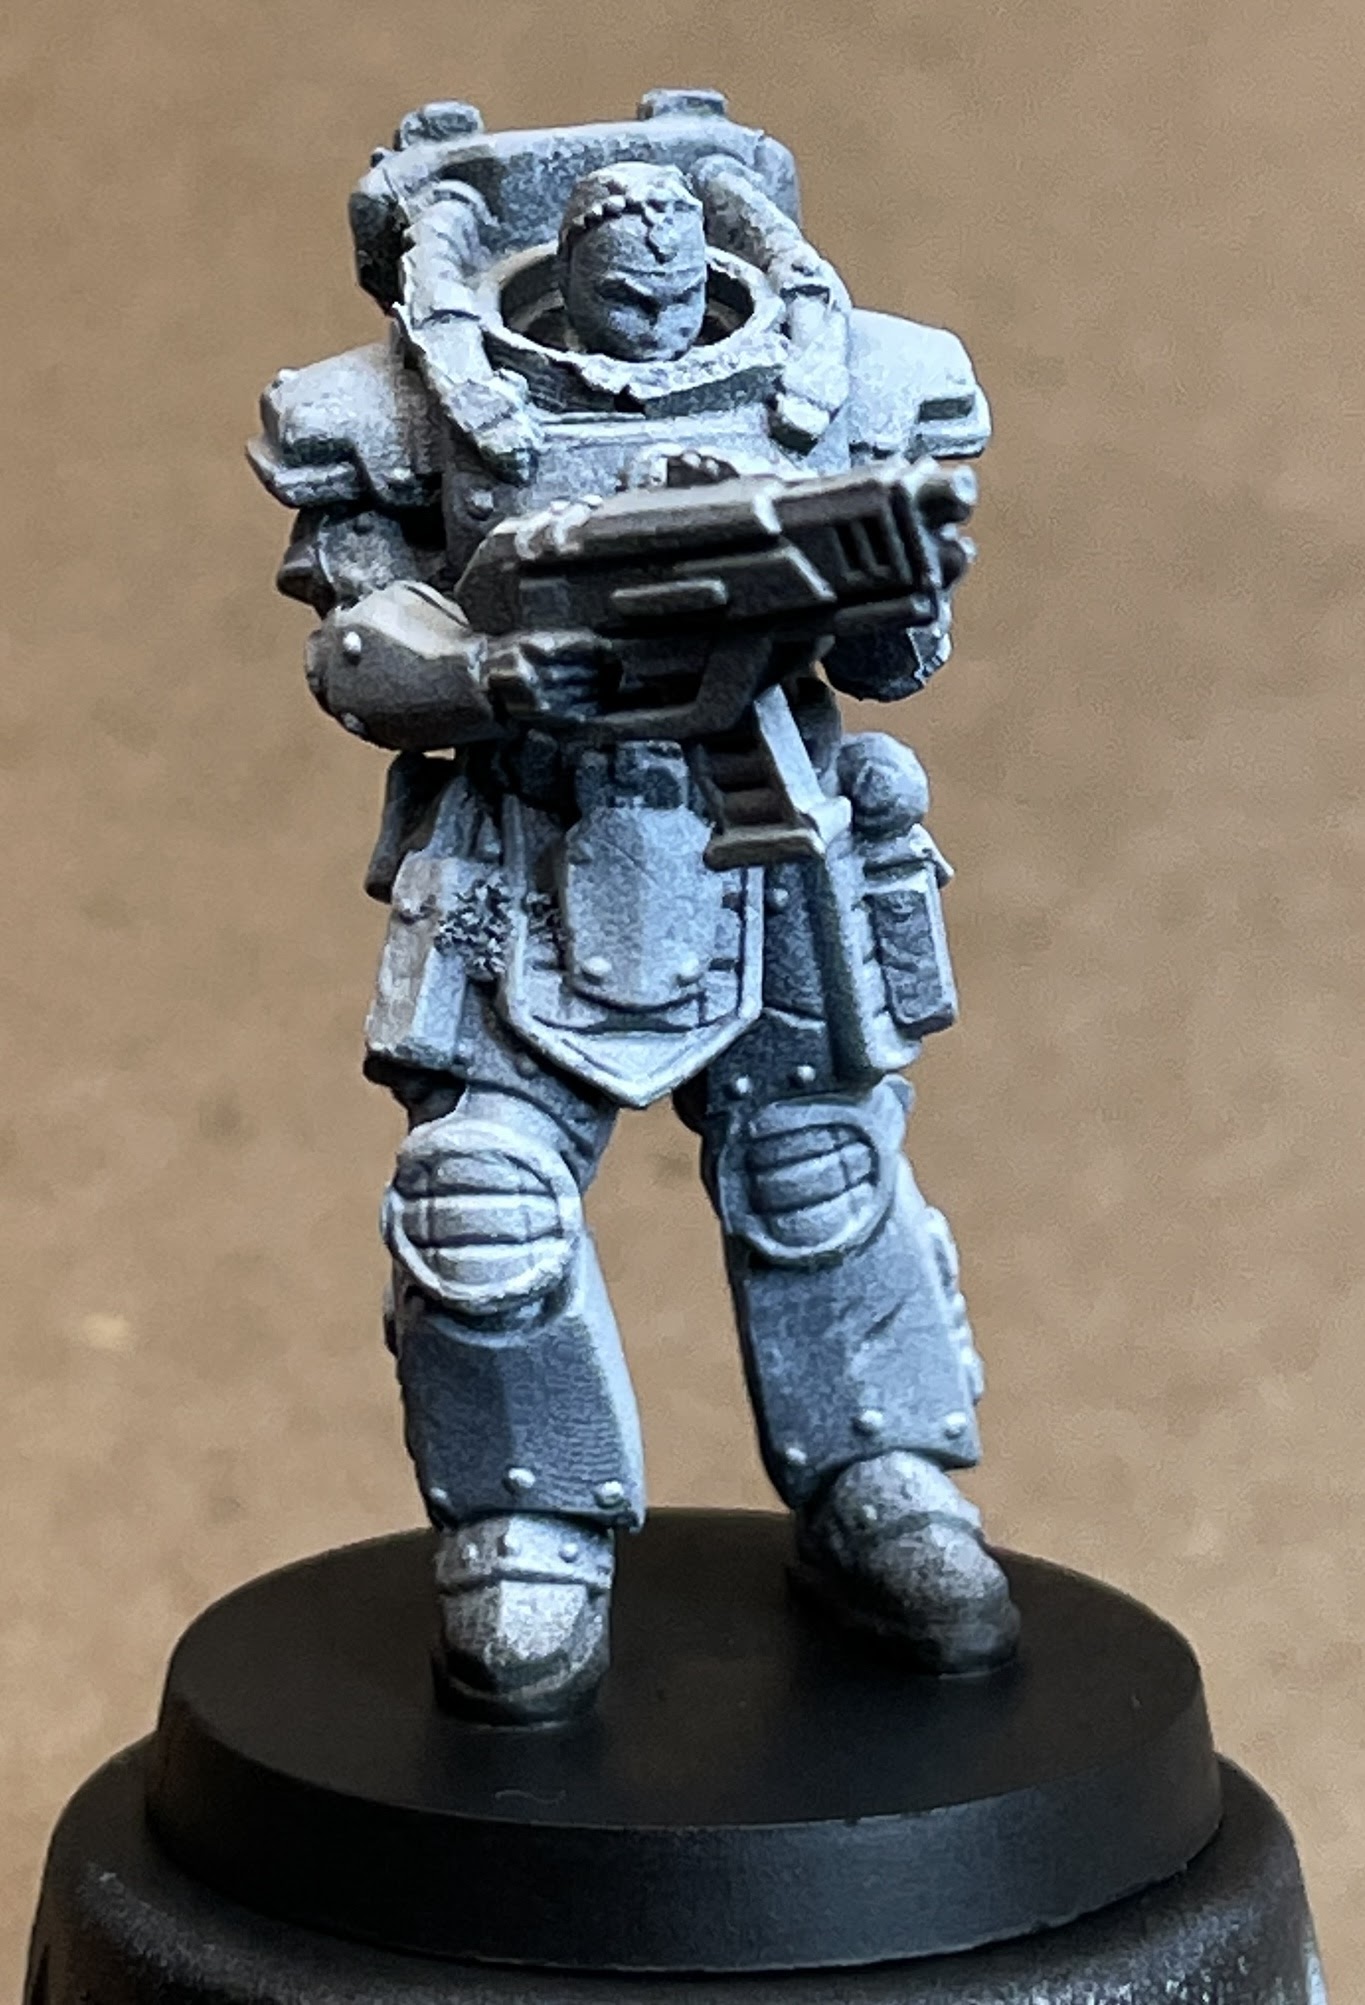
The first type is the 'red room' which is the only type of room in which characters with the 'Military' designation can search.  I really haven't figured out any reasonable logic behind that rule other than to try to hinder them in some way to make up for the extra armor point they generally have over 'Civilian' characters.  The closest thing to an explanation that I could come up with is that the Military characters are usually decked out in power armor and may have difficulty shuffling through drawers or inside cabinets to find stuff.  One solution which came to mind was an 'item vending machine' to make items easily accessible.  The machine does not have a good index of what items are in each bin and therefore characters still get a random item.

Anyway, it seemed like a good enough excuse to design and print some special models for use in the modular Sci-fi walls/floors I use as replacements for the game's floor tiles.

This model prints as a single piece with no assembly required.  


The second type of 'special' room is the blue room aka 'Oxygen Room'.  These rooms are generally located near an airlock and allow characters to pick up an oxygen tank if they plan on going outside into an environment lacking the proper atmosphere mix for humans to breathe.  

I envisioned some sort of water-based oxygen extraction tank combined with storage tanks and portable canisters that can be pulled out of the filling station and ended up with the design pictured here.

The blue 'glass' is clear SirayaTech Blu resin tinted with blue alcohol-based dye.  They printed out very well on my Elegoo Saturn 3D printer.  I gave them a clear coat varnish which made them much more transparent and removed the cloudiness the curing process can create.

This model prints in several pieces and requires some assembly.

Here are a couple photos of the two models placed in the rooms.  Using special models instead of painting different colored floors kept the number of floor tile prints to a minimum as well as added a little visual interest to these special rooms.

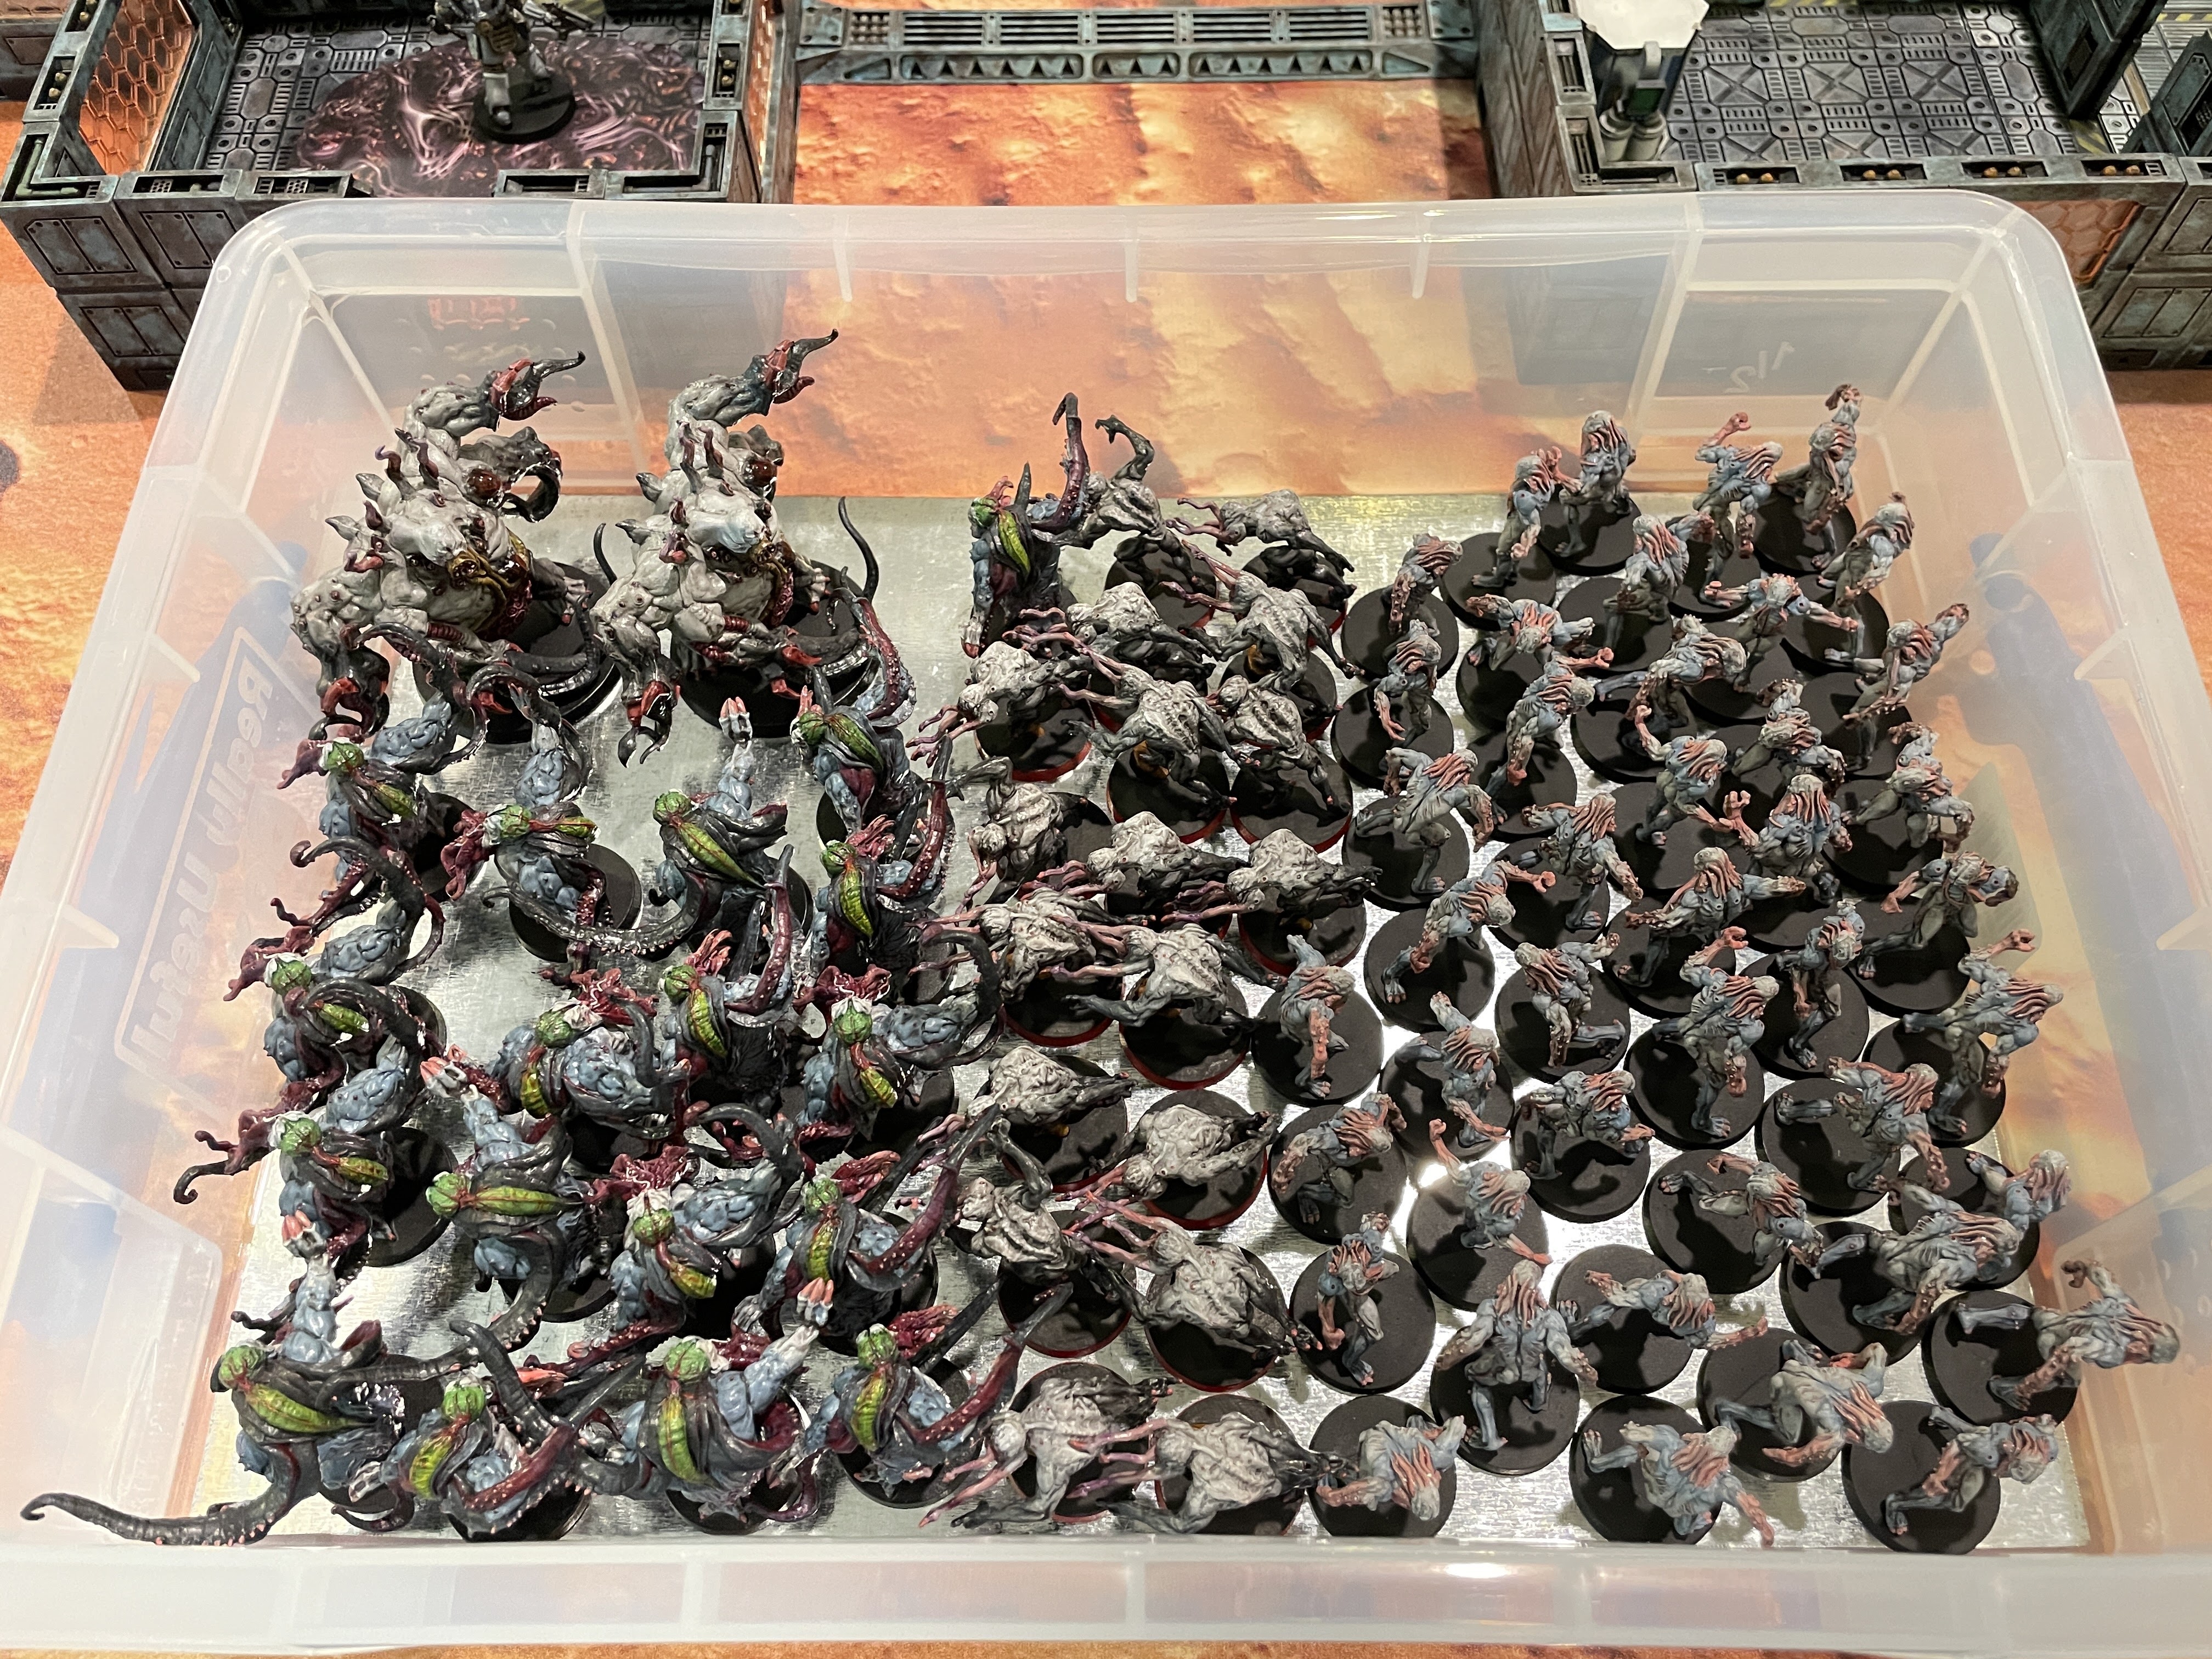
Here is a photo of all seven oxygen generators and six 'item vending machines' all together after assembly and painting. 

Along with these are the outdoor area separators that I designed, printed, and painted in the same blue/gray scheme as the walls.  The separators have spherical magnets on each end (or only on one end if they are a 'half' connector) that attach to the magnets of the wall sections and define the outdoor zones.


If you are interested in printing any of these models yourself, they are available on my Thingiverse page.

Zombicide Invader - Magnus


Magnus is the 2nd character of the Zombicide Invader Core set.  He came together a little faster than Jared, but still took a full evening.  The flags were probably a little easier than the flag on Jared.  The face, however, was a bit of a nightmare.  This is the first human face I've painted in several years...and I think it shows.  Too orange, not highlighted properly, and the beard got a little more orange than I intended.  Perhaps after I've gotten some more practice with other faces, I'll revisit this one.  


Paints used for Magnus:


Next up on the workbench...


Friday, July 15, 2022

Zombicide Invader - Spoiler Abomination


The Spoiler Abomination is the primary antagonist in the Zombicide Invader Core box.  I painted this large creature after I had already painted all the rest of the Xenos in the core box so I kind of knew the paint scheme and techniques I planned to use.

This abomination wasn't too difficult to paint thanks to several YouTube videos and plenty of game art for reference.  For the most part, I tried to stick to the artwork, but there are a few differences to note.  I wanted to keep the large tentacles looking similar to how I painted those on the Tanks which is the primary difference.  The small appendages coming out of the top orifices are also a bit different from the reference white.  I wanted them to match the Hunter face tentacles to tie them together a bit.

What could be more fun than painting a large wacky tentacle monster?  Two of them!  The Kickstarter included a second model of this figure and it can really give a different feel to the gameplay when both of them come stomping out on the board.


Below are the paints and steps I used to paint these:

Prime Grey Seer
Main body
Hi-light pale skin
Hands
2 glaze, 2xenos carapace, 1 gun black
Inside - crusted sore
legs
Black fade down to grey
Stinkhorns
Fade to black
Red wash inside
Purple outside
Tubes
Crusted sore
Big Tentacles
Black/xenos carapace top
Crusted sore bottom
Pokeys tentacle red
gullet
Yellow
Soft tone
belly/mouth
Crusted sore
Drybrush pale skin
Dot pie pieces pale skin
Red wash
Stones
Black/xenos carapace
Pure red
Hi lights
Gloss
claws
Tentacle red
Red wash
Invader shader +quickshade medium


Thursday, July 14, 2022

Zombicide Invader - Tank Xenos


The Xeno Tanks are tougher than most of its cousins and can really slow down the characters as they try to accomplish their mission.  Of the Xeno types, these took the longest to paint as one might expect given the larger, more complex models.  I'm fairly happy with how they turned out, however, the satin sealer gave them a bit more of a shine that I like.  I may decide to re-spray them with a matte finish, but would then want to re-apply the gloss to the face tentacles...  They are considered 'done' for now.


All of the tentacles flailing about causes them to cling to each other and reminds me of a Barrel of Monkeys.  This was a bit more problematic when I stored them all together in a ZipLock bag, but still can be a bit of an issue when trying to pull out just one from the storage container.


Here are the tanks filling the rooms around Jared who has his work cut out for him.


Here are all of the core box Xenos fitting securely in their magnet storage container.  They fit quite well into the 4L "Really Useful Box" and are a lot easier to access than the formed plastic insert that came in the box.  Not to mention, the extra Xenos from the Kickstarter wouldn't fit into the core box inserts so they needed some other place to live.  


Below are the paints and steps I used to paint these:

Prime Wolf Grey
underarms, face, hands, legs
Armor grey
Pale skin hi-lights
Invader shader+mixing medium
belly
Dry brush pale skin
Crusted sore sores
Red tone
Back
Xenos carapace
Black+xenos carapace near organ
Invader shader+mixing medium
Back organ
Daemonic yellow
Dragon red veins
Green tone
Brain
Soldier green
Dragon red veins
Green tone
Nails
Tentacle red
Face tentacles
Crusted sore
Tentacle red hi lights
Invader shader+medium
Big Tentacles
Black/xenos carapace top
Crusted sore bottom
Pokeys tentacle red
Eyes
hydra turquoise

Wednesday, July 13, 2022

Zombicide Invader - Hunter Xenos


The Hunters can be the most dangerous enemy in Zombicide Invader due to their double activation capability and potentially large numbers. 

These Xenos were my favorite of the core box alien miniatures to paint.  The blend of black to white was quick to do and turned out better than I had hoped for.  The extra Hunters included with the Kickstarter are a nice addition to the game.  Running out of miniatures is less of a penalty than in other Zombicide games so it doesn't change the balance much.  It is just neat to see more miniatures filling the map as things get out of hand.


Below are the paints and steps I used to paint these:

Prime Grey Seer GW
Legs and hands blended up
2 glaze, 2xenos carapace, 1 gun black
Top
Pale skin
Highlight abomination white
Tentacles
Red tone
Purple tone towards ends
Nails
Tentacle red
Holes
Red wash
Rock
Rigid brown
Strong tone
Everywhere except tentacles
Invader shader + quickshade wash mixing
Base
Top black
Edge dragon red
satin sealer
Gloss tentacles


Tuesday, July 12, 2022

Zombicide Invader - Worker Xenos


The "Worker" Xenos generally pose less of a threat when on their own than their "Hunter" cousins, but are the most numerous type in the Zombicide Invader Core box and can be problematic when in large numbers.

These were relatively quick to paint (compared to the Tanks) and turned out decent enough.  I used the Army Painter Invader paint set and I must say I'm not a big fan of what they call "Tentacle Red".  It is more of a "Pepto Bismol Pink".  

The Workers were the first set of models I had painted in quite some time and they worked well to get me back into the swing of painting again.  


Here are a few photos of all the workers flooding the hallways of the map I had laid out.


Below is the list of paints and steps I used to paint these:

Prime Grey Seer GW
Legs, upper torso
Xenos carapace + glaze + water
Arms, tentacles, bumps
Tentacle red + glaze + water
Holes, belly stripe
Red tone
Everywhere
Invader shader + quickshade wash mixing medium
Face and other high areas
Pale skin drybrush
Base
Black
Matte sealer
Tentacles, eyes
Gloss


Monday, July 11, 2022

Zombicide Invader - Jared


The first character of the Zombicide Invader Core Box.  I chose to work on Jared first because this model probably has the most YouTube videos and game artwork to use as a painting guide.  This model missed completion for the 4th of July Independence Day celebrations, but still fits in the patriotic spirit of the month.
The flag artwork on the chest plate took a while to complete, but was less work than I thought it would be to get it looking at least decent from a table-top distance.   I actually got the red and white stripes painted in one attempt.  The stars were a bit more fiddly though.

Overall I'm happy with how this model turned out, however, it took a very long time to paint.  The Zenithal prime helped to some extent, but due to a lot of errors in painting the various bits, I ended up trying to do some wet blending and other 'repair efforts' on the white armor.

I'm sure I could have spent a lot more time refining the highlights and cleaning up various areas.  I'm trying to finish each character the same day I start it just to put some sort of time limit to prevent getting bogged down and losing momentum (and enjoyment).


Paints used on this model:


Next up on the workbench...