Tinning the roof has begun. Below are some of the tools I'm using for the job:
On the top left is an orbital sander that I borrowed from a friend of mine. With all the use I've gotten out of it, I probably should just buy him a new one... I did buy a new set of sand paper so I'll at least return it to him in good condition. The sander is used to remove the printing on the tin and rough up the other side as well to give the glue and eventually paint something to grab on to.

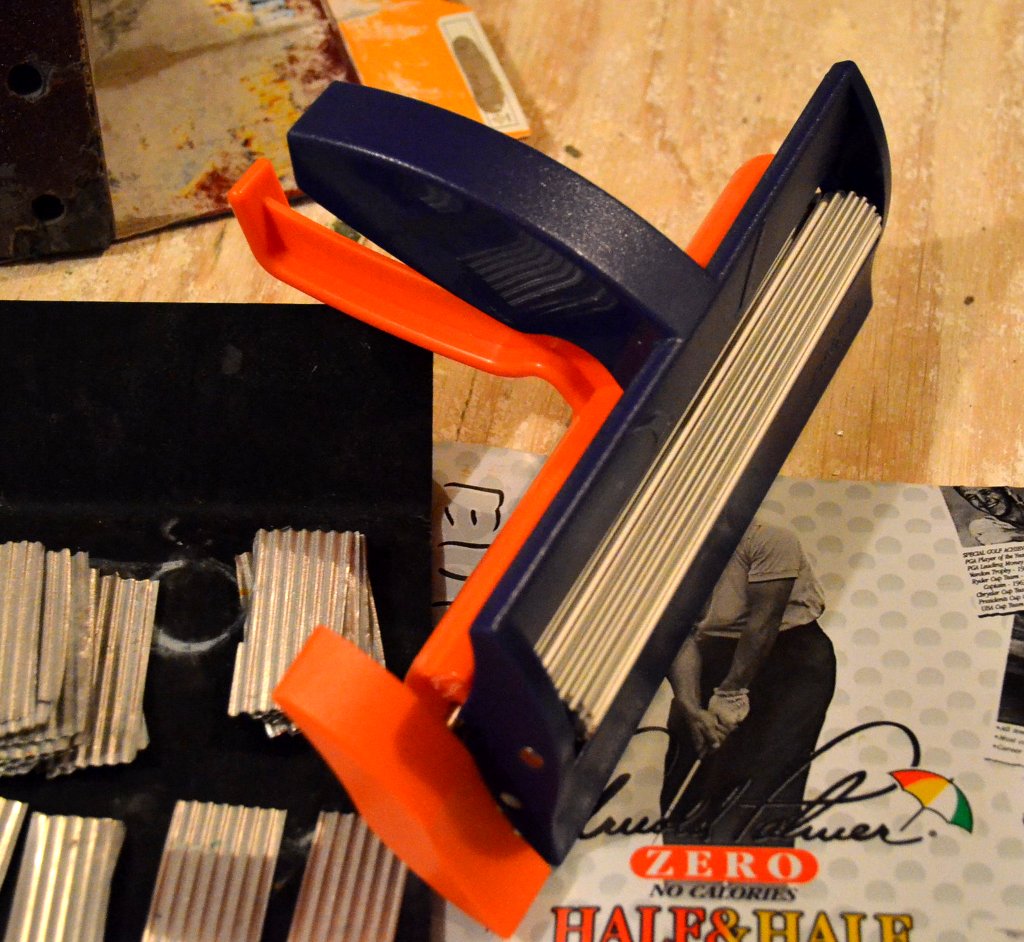
Here is the
Fiskars Paper Crimper.
It creates the nice corrugated pattern in the tin. Under the crimper is the tin from the can of an Arnold Palmer drink. It is a favorite drink of my parent-in-laws. Although a little taller than a standard 12oz can of soda, both work equally as well. Not pictured, a
Kitchen Shears
similar to the one linked, was used to cut the beverage container apart. Do not use the household shears for this! Cutting tin isn't its designed function and although it will cut dozens/hundreds of cans apart without fail, it will be significantly traumatized by the experience and will never cut the same again. If you do have one in the kitchen, you might consider buying a new one and swapping it out for the old one. The old one can then migrate to the hobby tool chest and the kitchen can take advantage of a shiny brand new one. Win-win for all involved. ;)

Moving on, the glue I use for this step is
Gorilla Super Glue. It is less expensive per ounce than the Loctite I use for gluing the balsa together, has more working time, and forms a little better bond between the tin sheets. The extra working time requires the use of clamps and clothes pins to keep the pressure on the pieces long enough for the bond to form. I highly recommend wearing disposable gloves and a respirator when
working with the Gorilla Glue. I happen to be somewhat allergic to the
fumes so the
3M Respirator
I purchased allows me to work with the stuff safely. Getting the glue
stuck to my fingers (which is inevitable when working with so much of it
for so long) is extremely irritating and painful to get off so the gloves
are a big help. Plus, the gloves help prevent getting poked and cut by
the sharp edges of the tin. Ok, enough talk about safety
equipment...
Applying the bottom row of tin. I've started on two sides to allow me to trade back and forth as one piece dries, I can work on the other side. It normally only takes 30 seconds or so for the glue to grab, but sometimes I get a little carried away and put too much glue on which takes a few minutes to set up...
About half of the first row is done in this photo. The black clamps shown in the photo are extremely helpful in working on the second and subsequent rows. Their long reach and point pressure makes the tin so much easier to deal with. Specifically, they are
Wolfcraft QUICK-JAW Needle Nose Spring Clamps. I got mine from
Menards.
Here the bottom layer of tin is complete. It took about two hours to go from tin can to the first layer glued down.
The round black things on the right side of the frame are magnets. Another pair of them are on the underside of the roof. They are working to press together a particularly troublesome pair of tin sheets long enough for the glue to set up.
So far the roof is shaping up quite nicely. Another couple hours and it should be all tinned up. Most likely I'll forget to leave a hole for the chimney, but I'm hoping that writing it here will help me to remember. ;)

 Here is the Fiskars Paper Crimper.
 Moving on, the glue I use for this step is Gorilla Super Glue. It is less expensive per ounce than the Loctite I use for gluing the balsa together, has more working time, and forms a little better bond between the tin sheets. The extra working time requires the use of clamps and clothes pins to keep the pressure on the pieces long enough for the bond to form. I highly recommend wearing disposable gloves and a respirator when
working with the Gorilla Glue. I happen to be somewhat allergic to the
fumes so the 3M Respirator
I purchased allows me to work with the stuff safely. Getting the glue
stuck to my fingers (which is inevitable when working with so much of it
for so long) is extremely irritating and painful to get off so the gloves
are a big help. Plus, the gloves help prevent getting poked and cut by
the sharp edges of the tin. Ok, enough talk about safety
equipment...
Moving on, the glue I use for this step is Gorilla Super Glue. It is less expensive per ounce than the Loctite I use for gluing the balsa together, has more working time, and forms a little better bond between the tin sheets. The extra working time requires the use of clamps and clothes pins to keep the pressure on the pieces long enough for the bond to form. I highly recommend wearing disposable gloves and a respirator when
working with the Gorilla Glue. I happen to be somewhat allergic to the
fumes so the 3M Respirator
I purchased allows me to work with the stuff safely. Getting the glue
stuck to my fingers (which is inevitable when working with so much of it
for so long) is extremely irritating and painful to get off so the gloves
are a big help. Plus, the gloves help prevent getting poked and cut by
the sharp edges of the tin. Ok, enough talk about safety
equipment...


No comments:
Post a Comment