Friday, July 8, 2022

Zombicide Invader - Miniature Organization

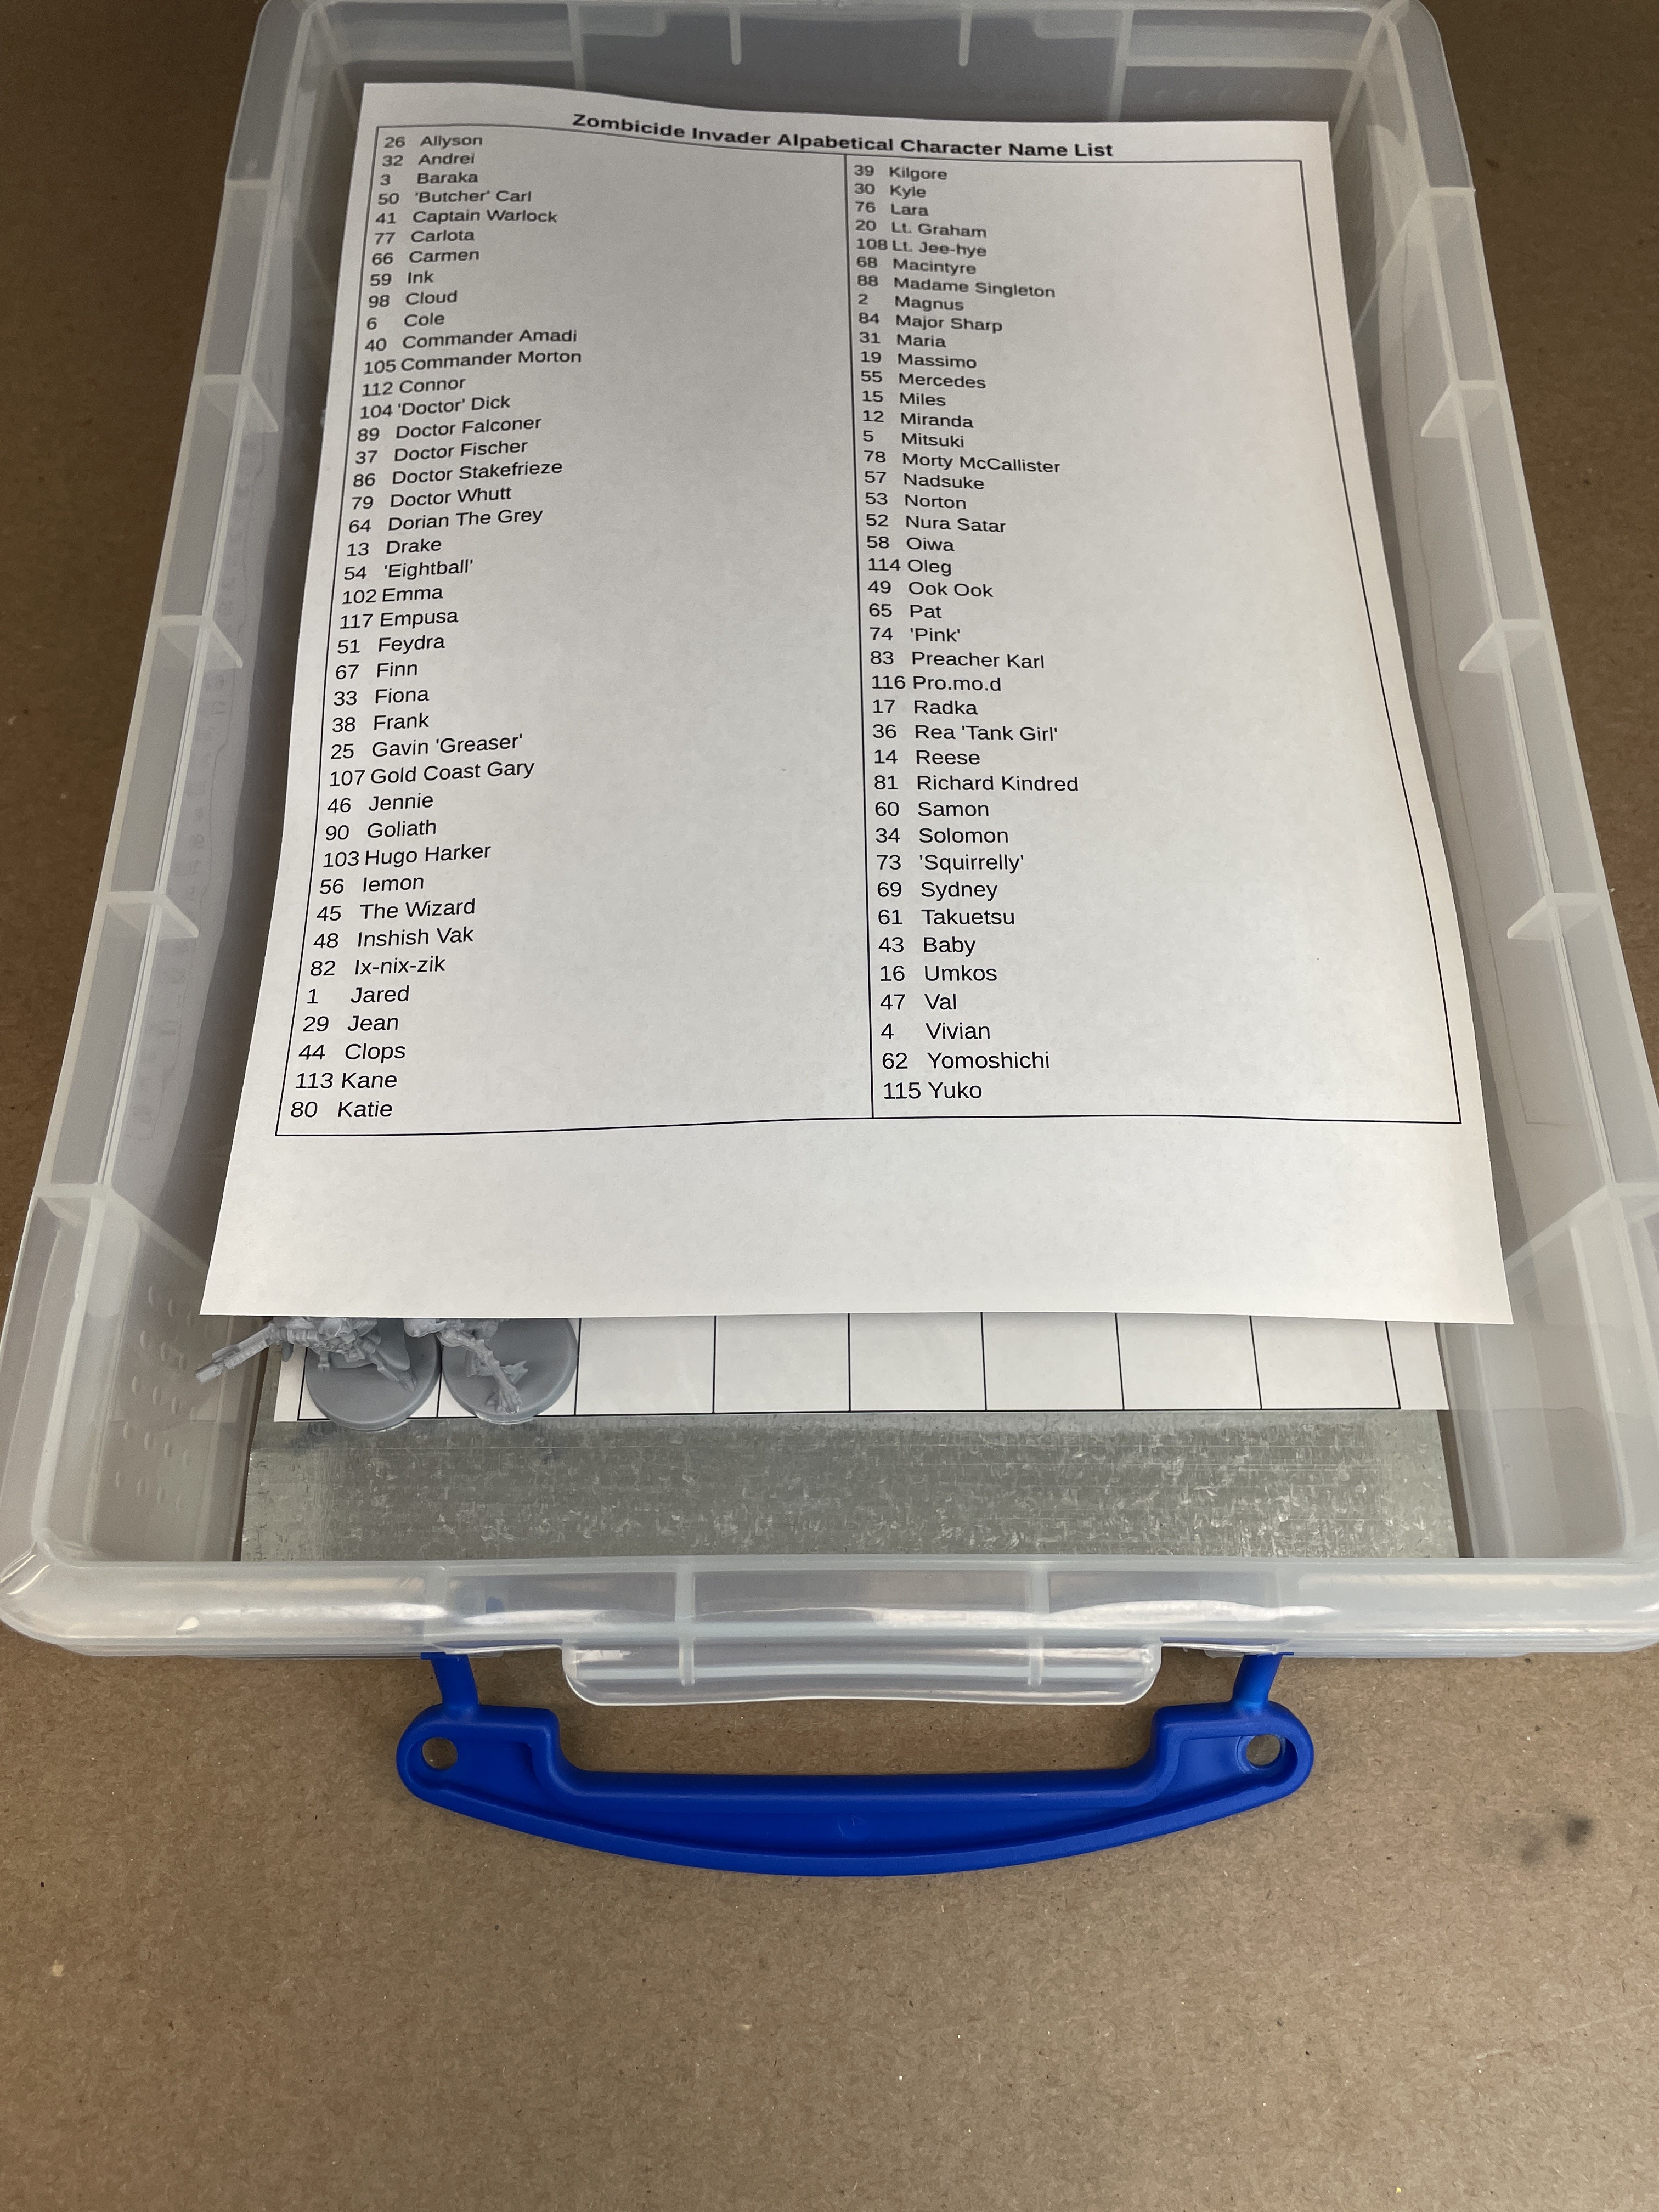
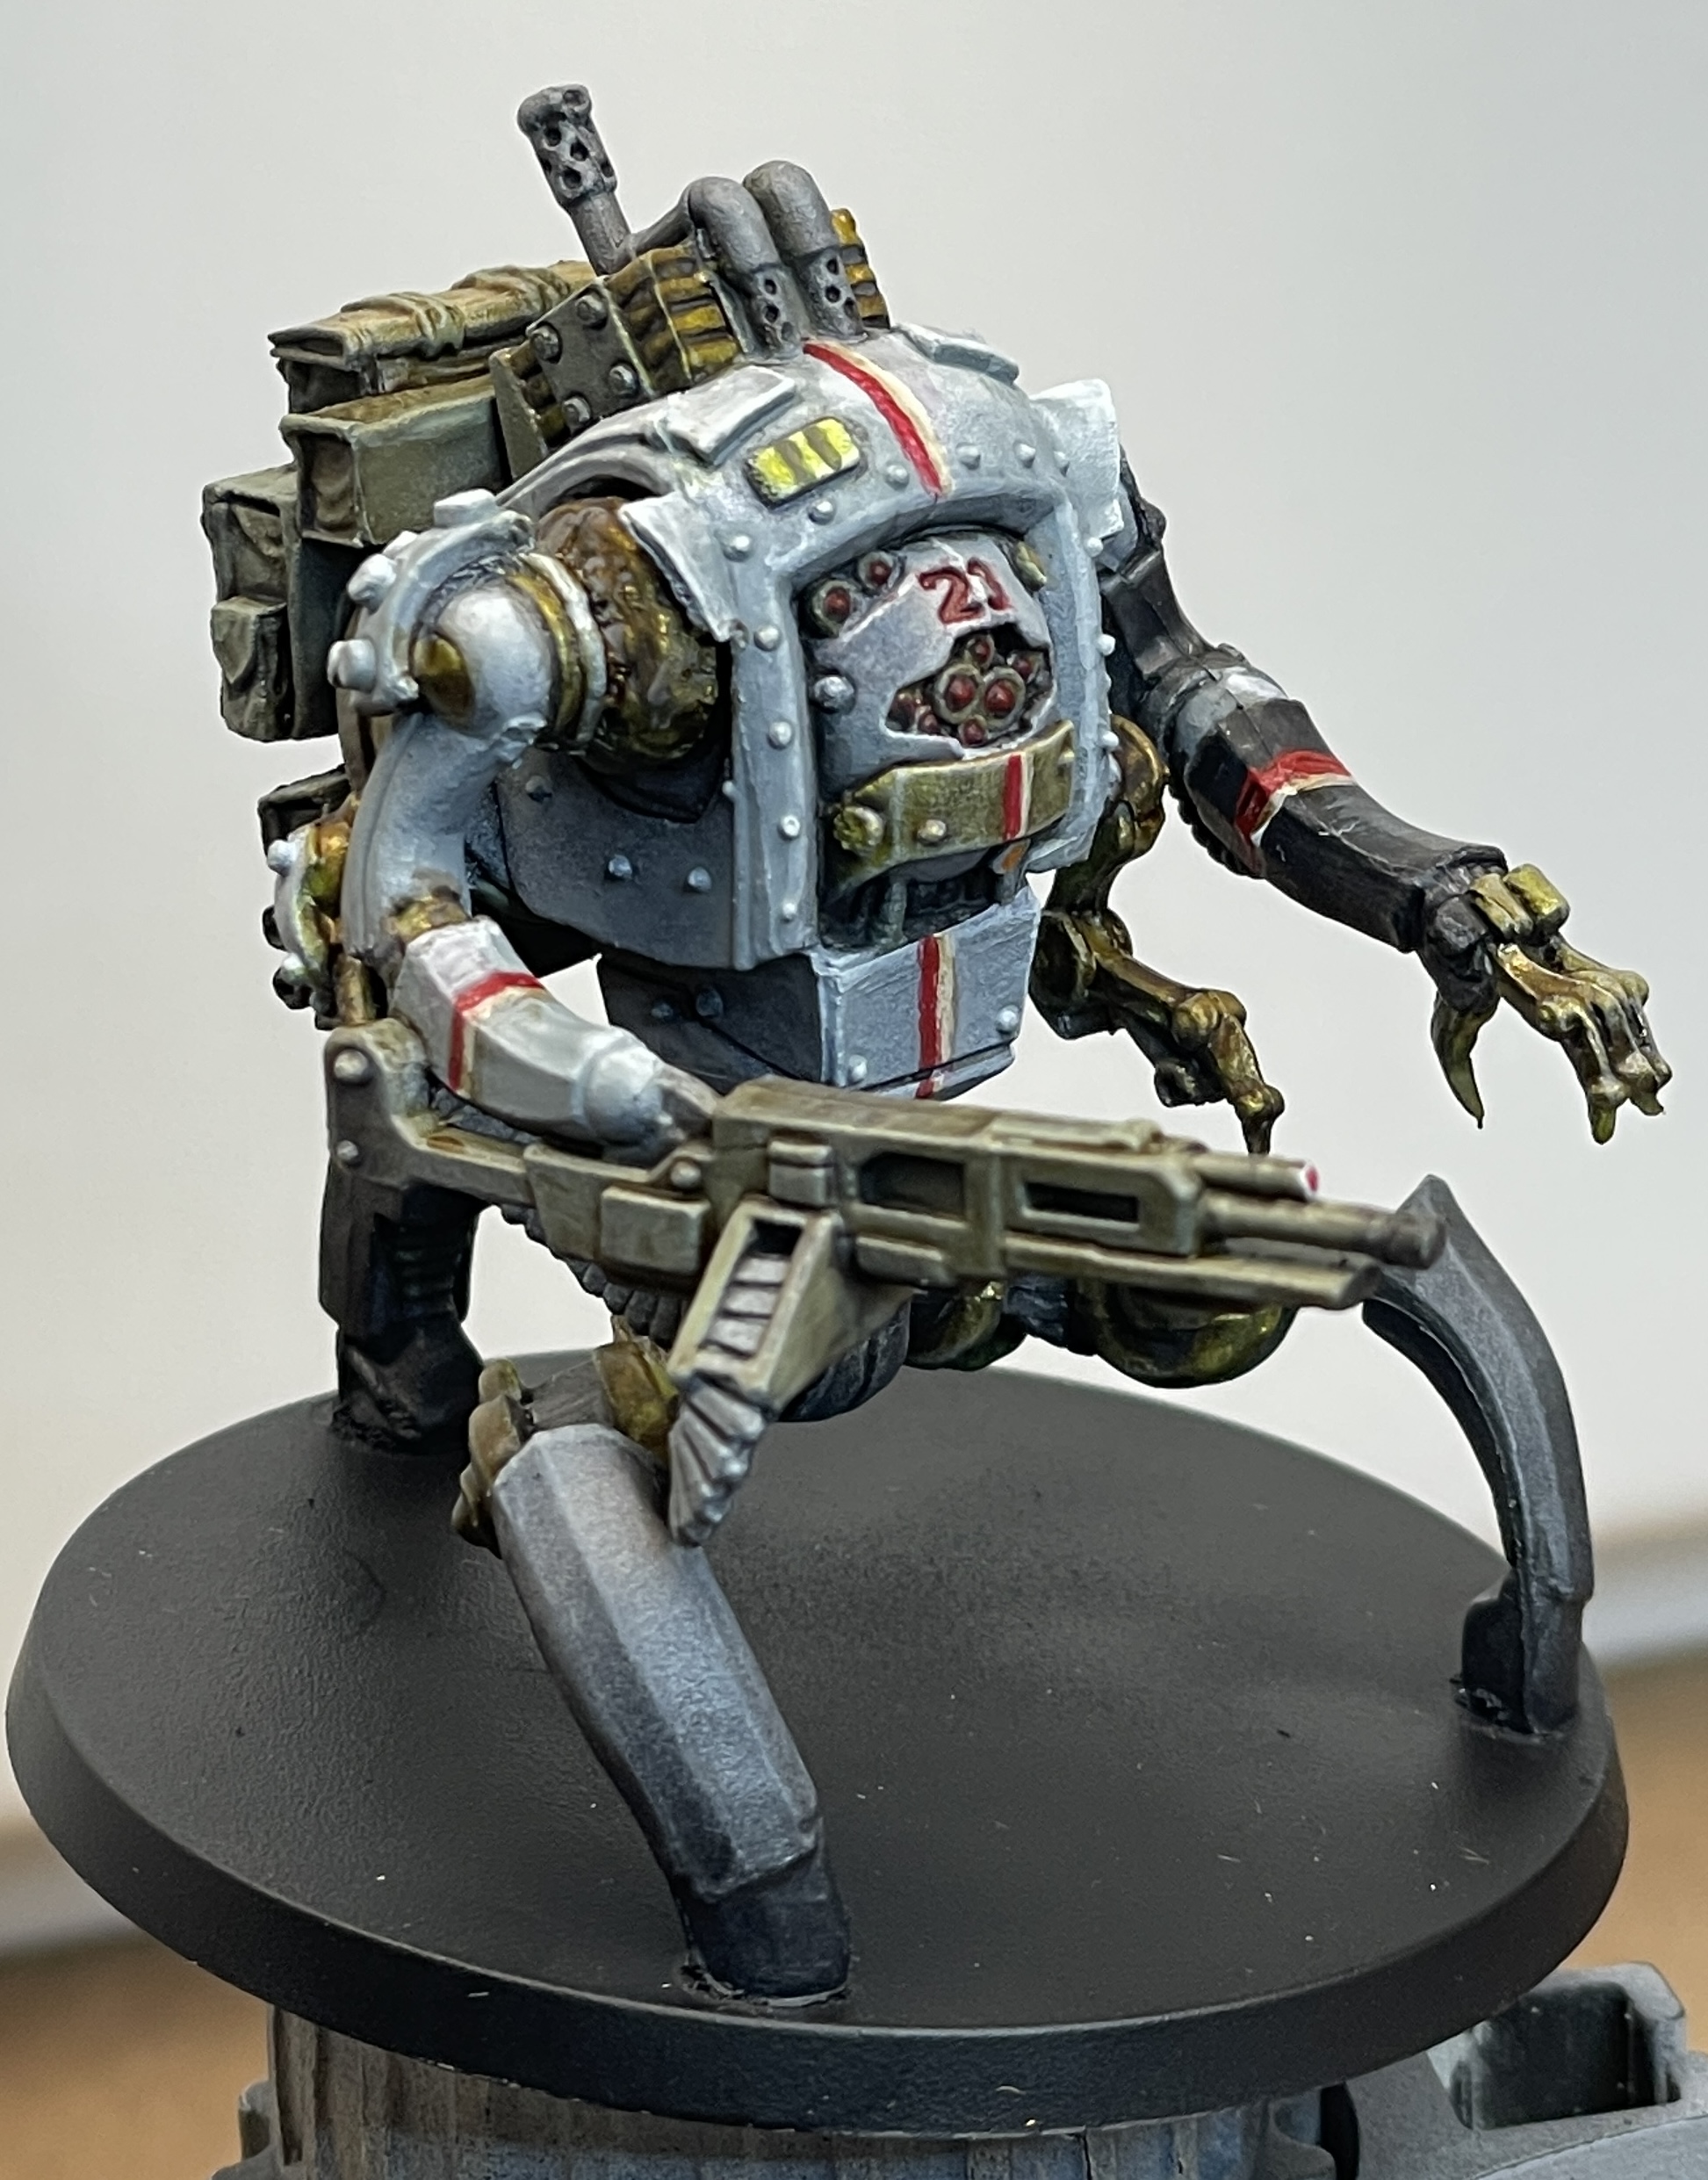
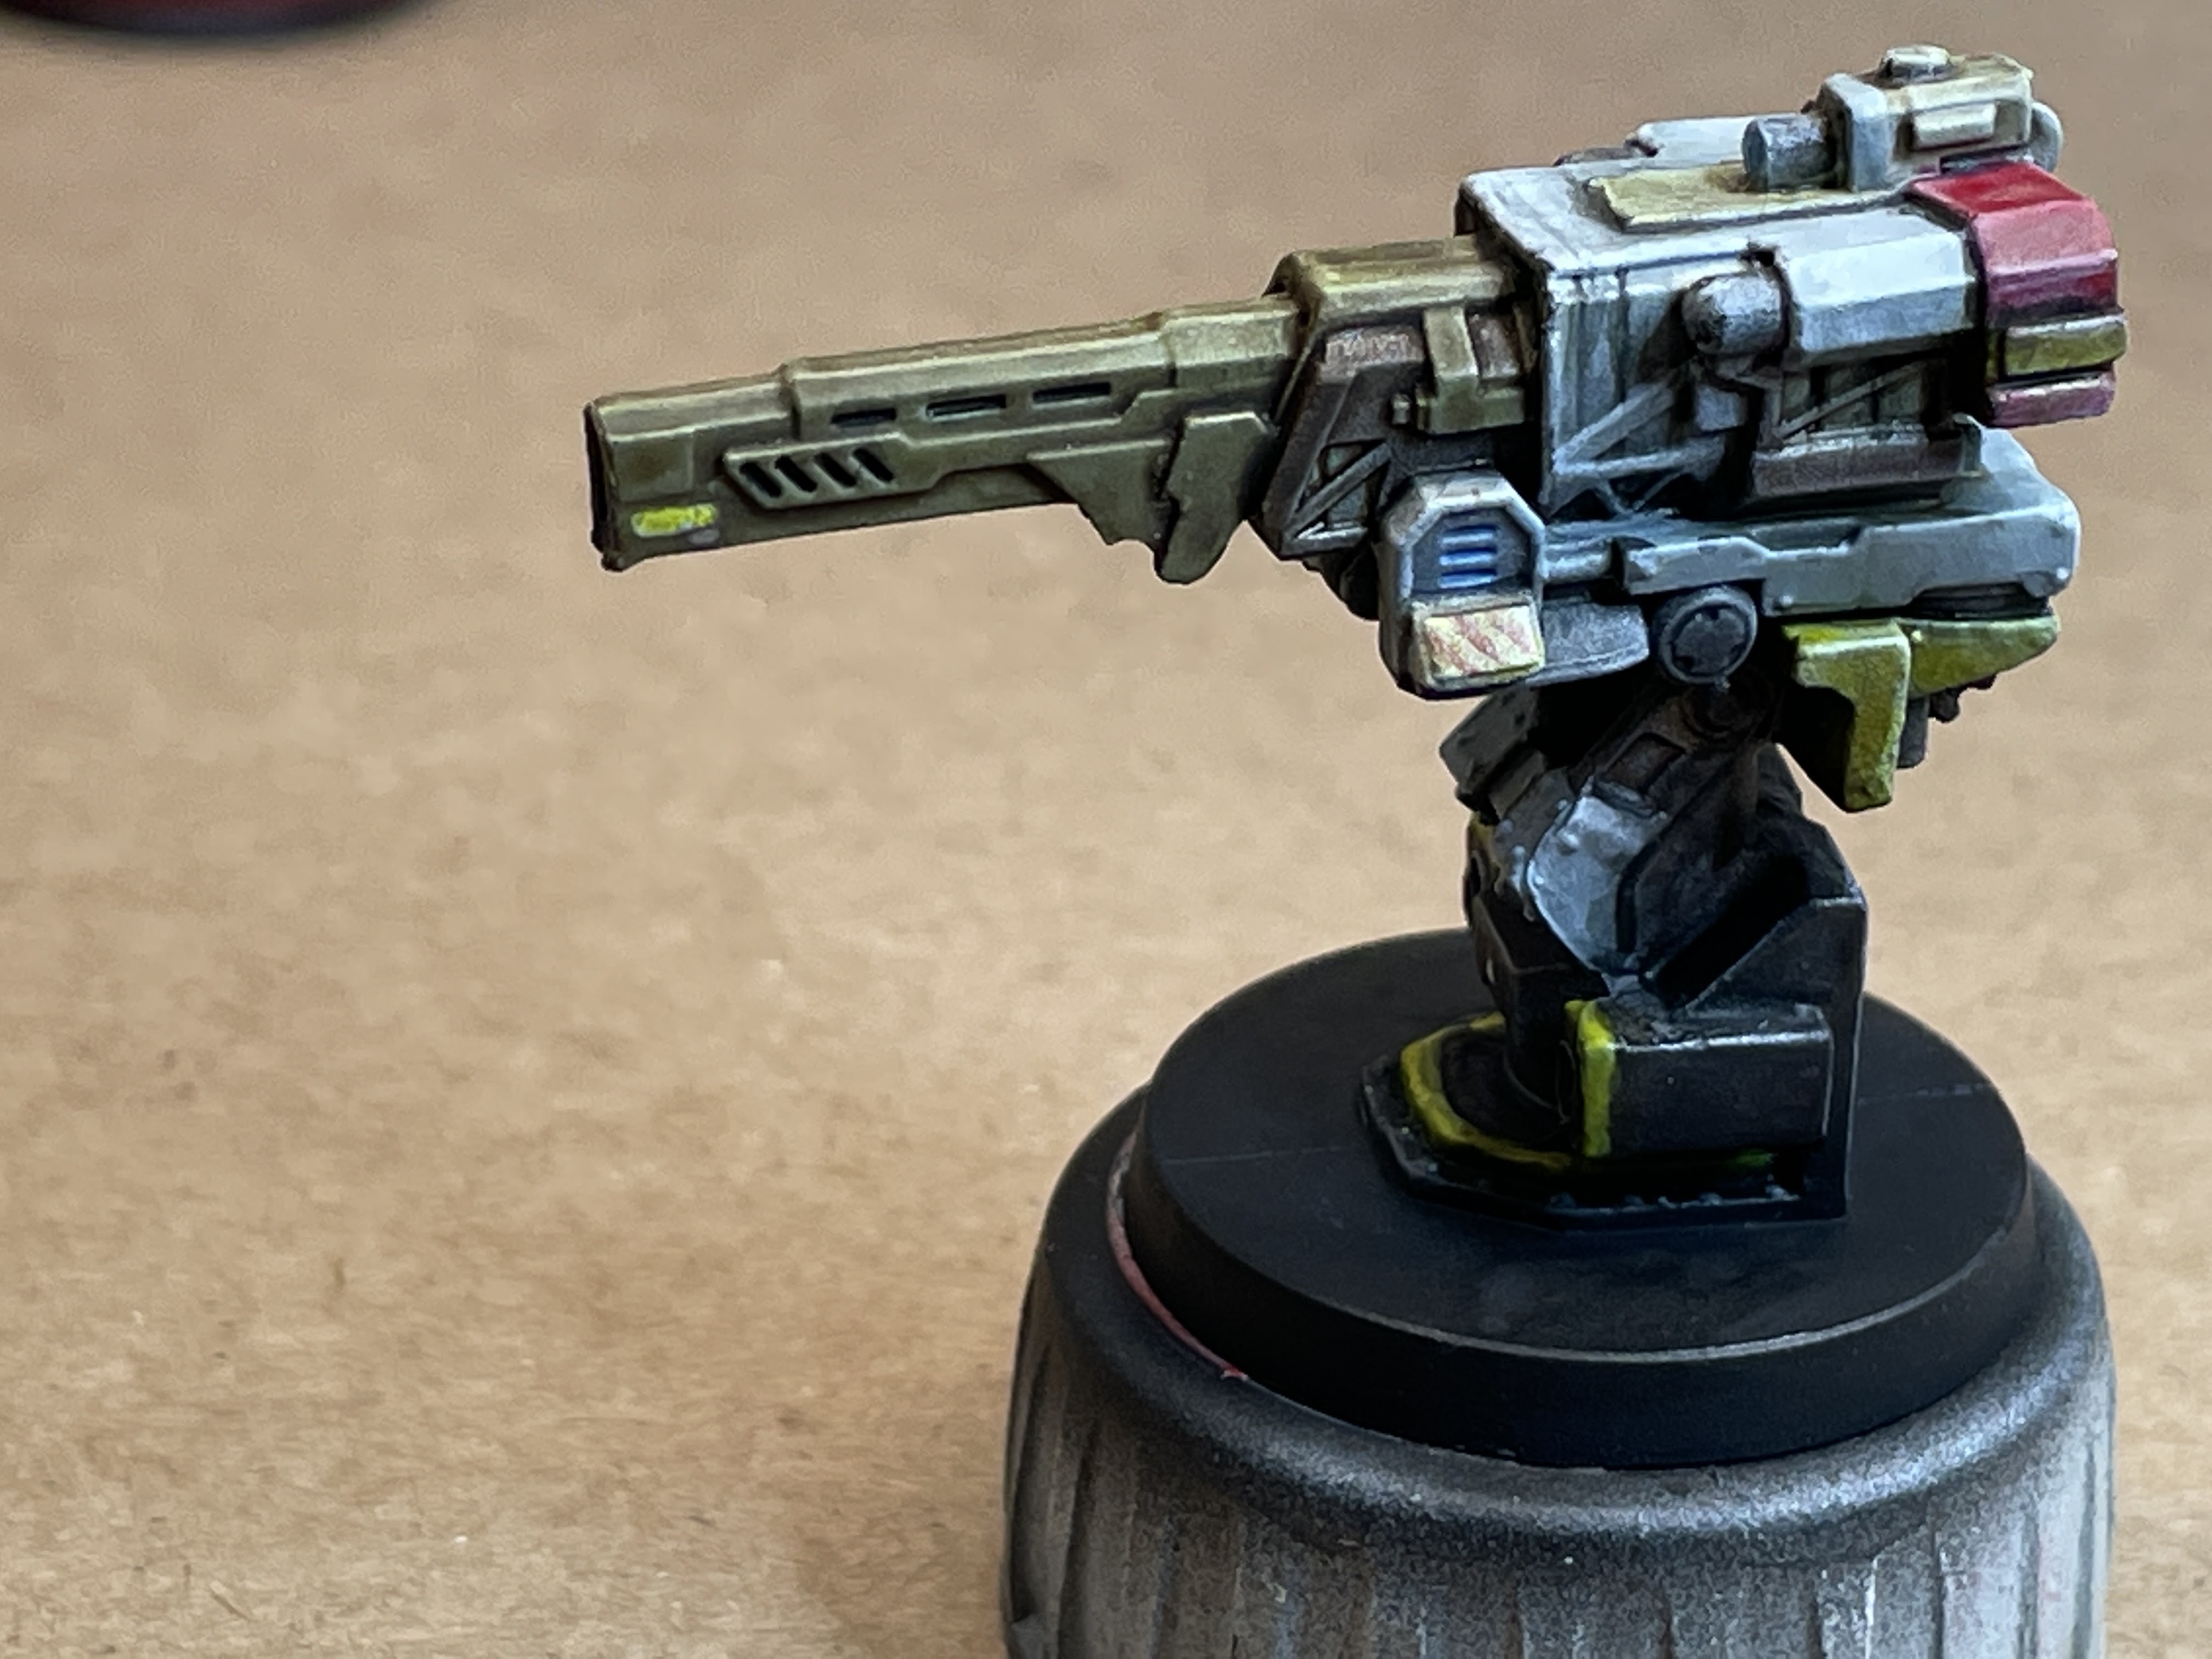
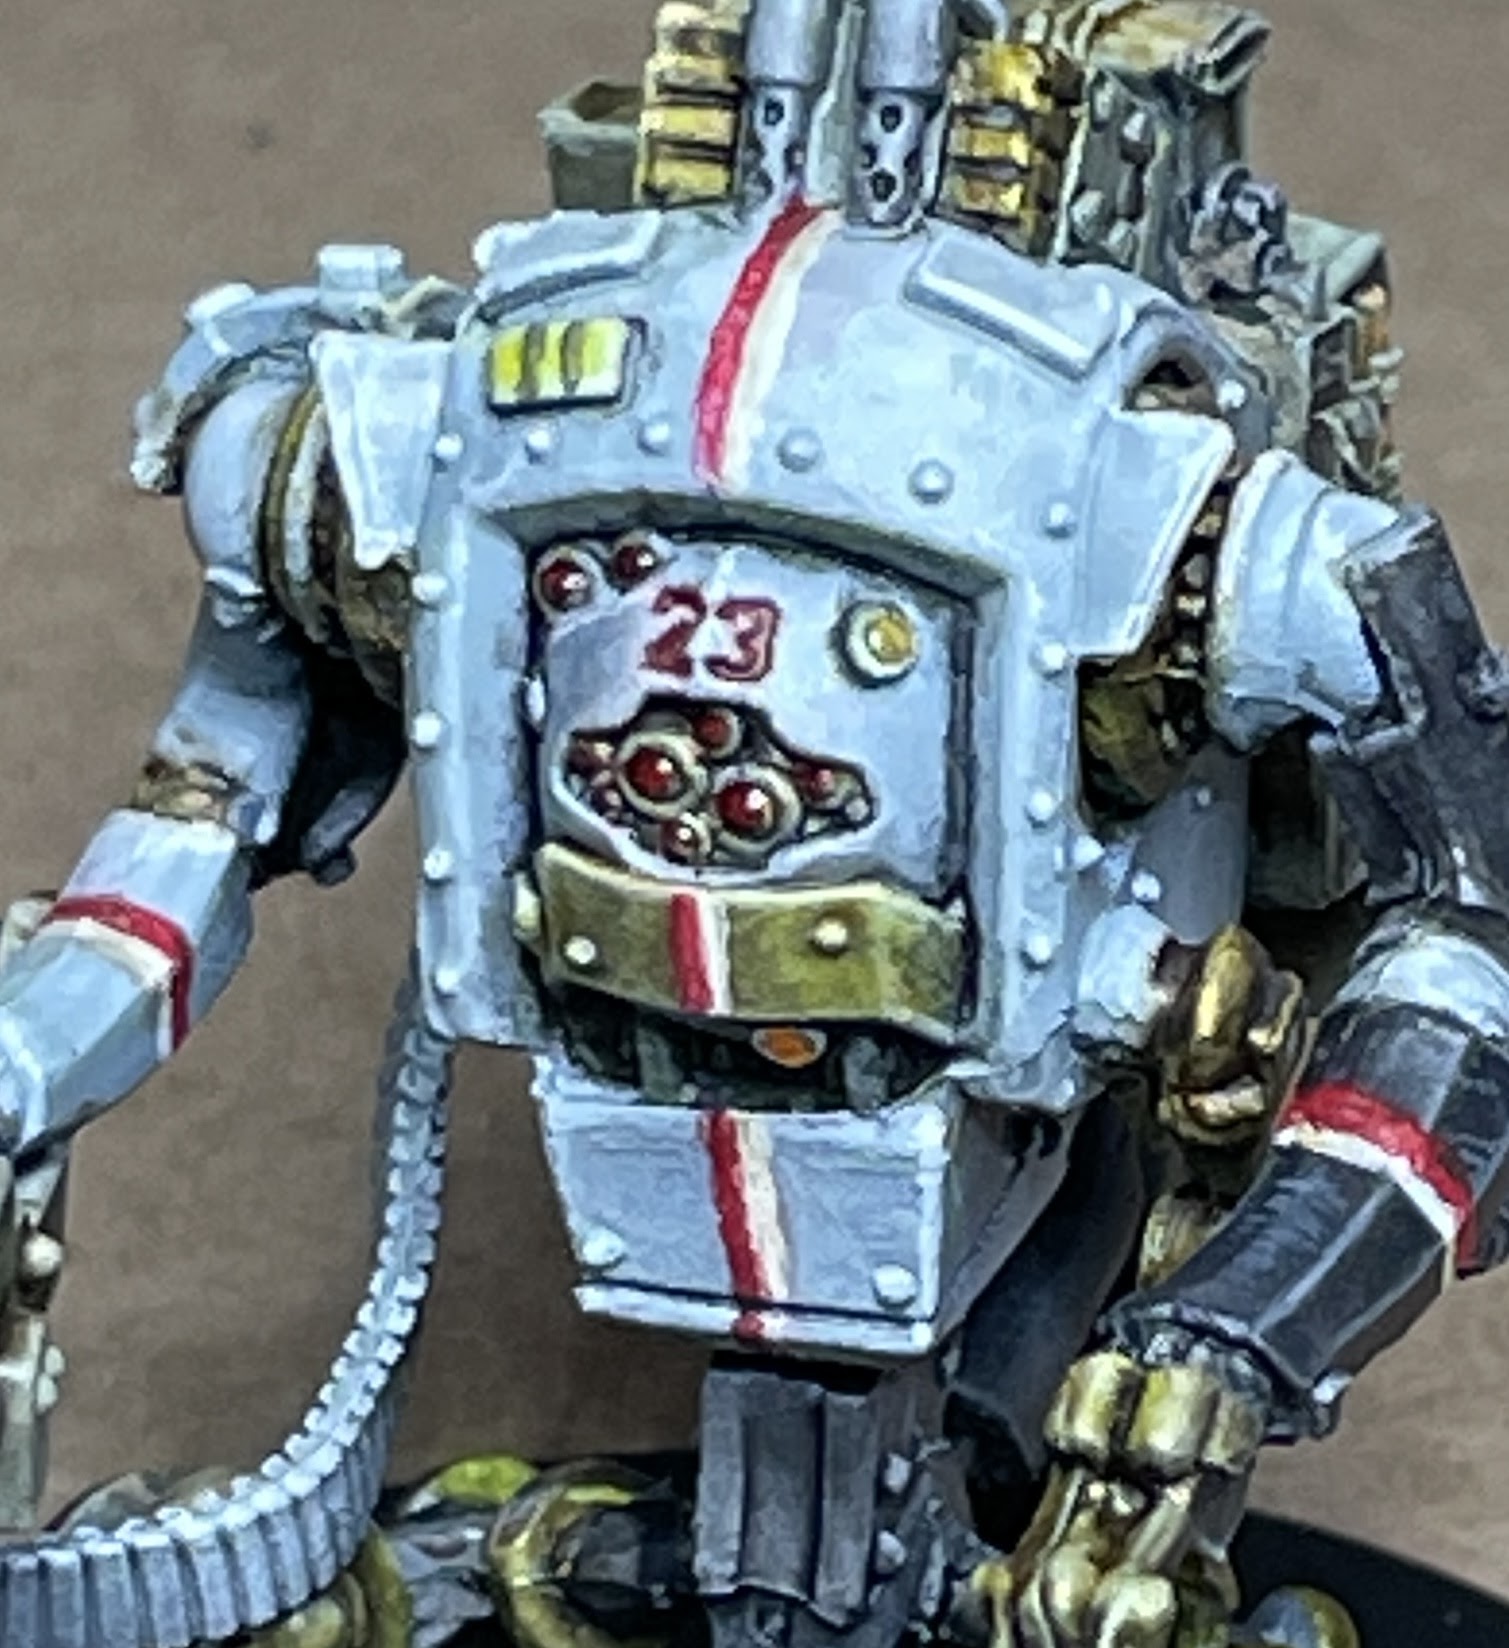
The Zombicide Invader Kickstarter includes several...well, more than several...miniatures - currently 83 playable characters alone including a Kickstarter exclusive from the Dice Tower.  The sheer number of characters alone was enough to make it difficult to get a game started due to having to find which figure corresponded to the various chosen character cards.  CMON added a convenient unique number to the bottom of each injection molded base the characters stand on, but unfortunately did not add the corresponding number to the character card.  Without being able to quickly scan for the correct number, the only alternative was to swim through the sea of gray miniatures looking for the 'correct' power-armor-wearing miniature and it was a bit of a daunting task.

Leaving the characters in the plastic trays was a bit miserable as well - especially if several of characters and Xenos are taken out at the same time so I ended up storing all the miniatures in a set of Ziploc bags.  The bag option was very space-efficient and was much faster to put away the Xenos and the rest of the miniatures at the end of a gaming session.  Now that I'm painting them, tossing painted miniatures into a bag together is not great for the paint job and just feels a bit...wrong, and not an acceptable solution.

The resources below may be useful to you if you are one of the 18,486 backers or one of the poor souls who decided later to buy a Kickstarter copy off eBay for the usual inflated price.

Anyway...I've now got things organized and a lot more accessible.

Here is a screenshot of the paper I printed out to place in the bottom of the plastic box.  Each square is a space for the corresponding miniature to find its home.  They are in order of the number on the bottom of the base and when combined with the alphabetical name sheet, each miniature can easily be identified and found very quickly.  Here is the link to the Google Doc for the printable name grid.  There is one row of names too many to fit on regular Letter-size paper so it is set up to print on Legal (8.5"x14") and cut down to fit into the 4L "Really Useful Box".  

Obviously, the miniatures aren't going to just stay on their 'home' space without some sort of encouragement.  I used a similar process to my Modern Zombicide Storage article from years ago.  While the jewelry trays used for that project stacked and stored nicely in the matching transport case, it was difficult to find trays that were slightly taller to accommodate taller miniatures.  I also found that the caulk-gun-applied adhesive used to secure the galvanized steel had a tendency to melt the plastic of the trays and was generally a bit messy to work with.

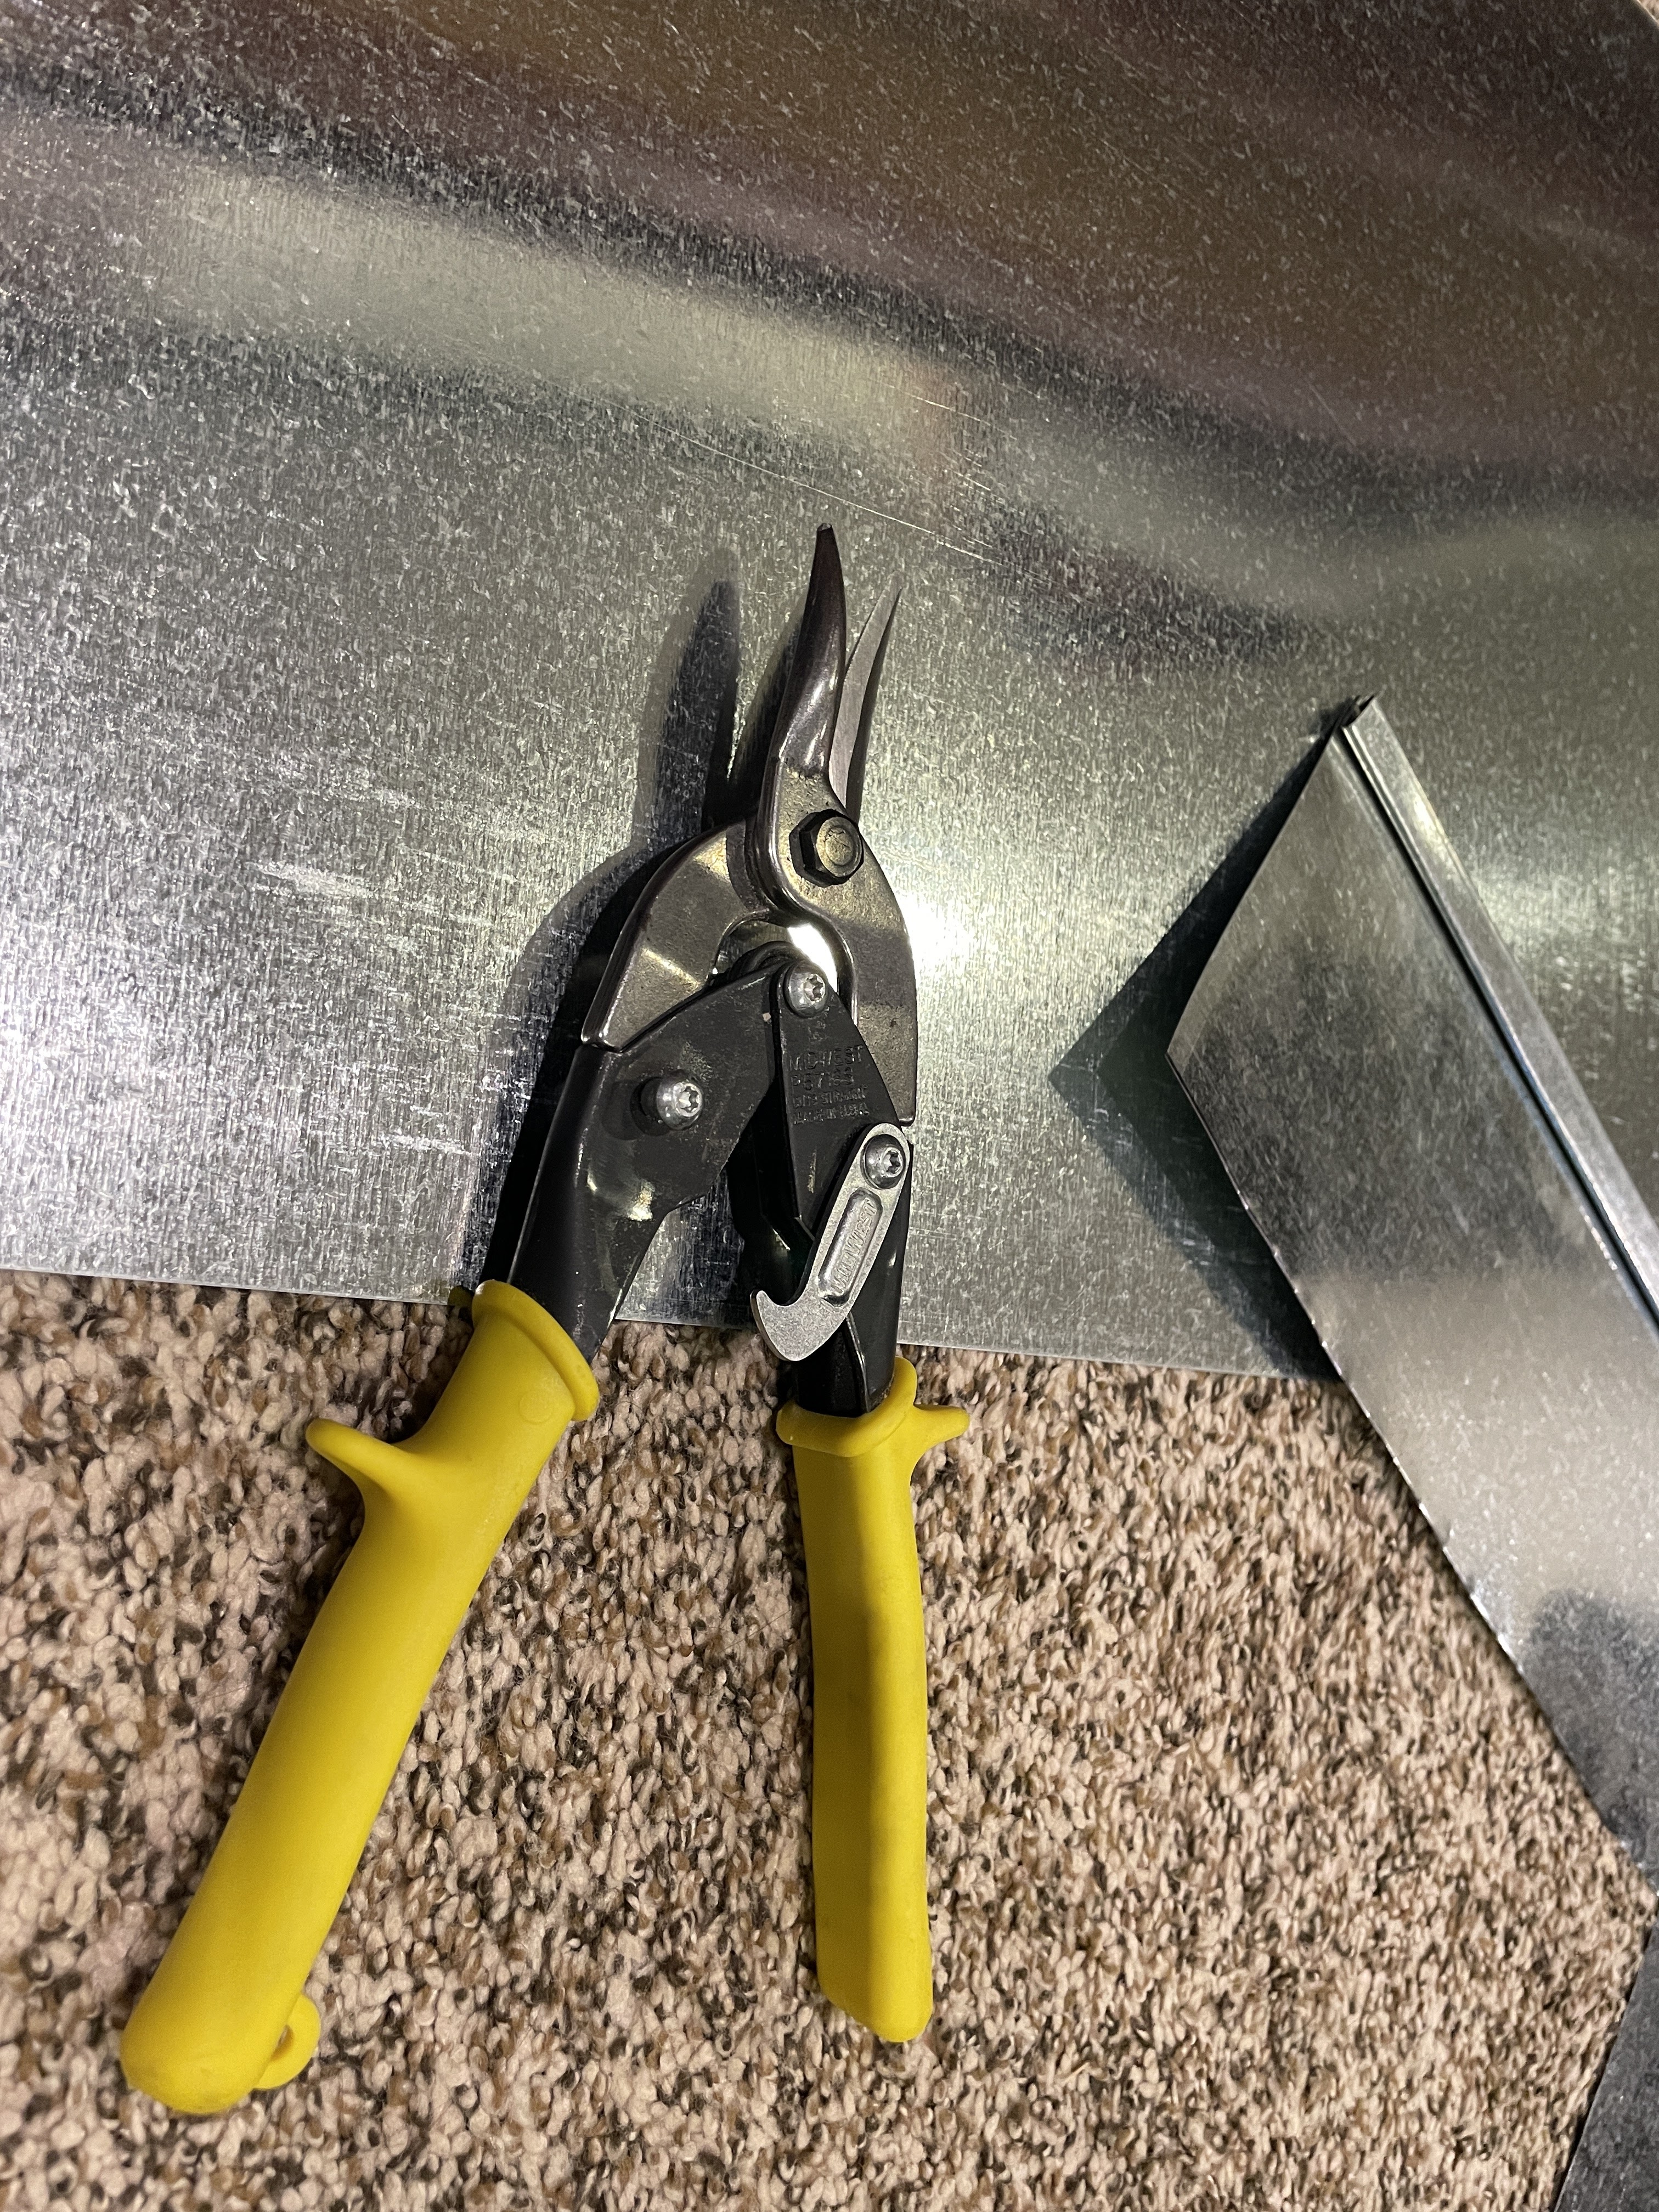
I found that the 4L boxes linked above have sufficient height to accommodate even the larger Invader abominations, but are not so tall that a lot of space was wasted when stacked on each other.  The same HVAC galvanized steel was cut to fit the box (it was easy to just place the box over the tin and trace around the little lip on the bottom of the box).  Gorilla Heavy Duty Mounting Tape, generally used to hang stuff on walls, replaced the messy caulk-based adhesive.  I simply cut 1" squares of the tape and placed 9 of them spaced out on the inside of the box.  The galvanized metal was then placed on top of the adhesive strips and pressed down.  Now the paper is placed over the tin to enable an easy-to-see positioning for each character.  Combining small magnets glued to each base similar to those used in my previous article, the miniatures now have magnet-driven motivation to stay put.

These miniatures were actually easier to glue the magnets as there was no need to drill holes due to their ridged design.  Unfortunately, the ridges are taller than the smaller magnets I had used previously and required a 1.6mm thickness.  The only downside to that is they are sold in packs of 100 for the same price as the packs of 150...

Here is the A-Z list of all of the Zombicide Characters that I am aware of - including the Comic Book Extras.  Even if you don't decide to go through the trouble of making the magnetic storage solution, the name-to-number reference should be useful to find the 'correct' power-armor-wearing character.  A printable multi-column layout is available in the same document as the name grid Google Doc linked above.

Please let me know in the comments section if anything is incorrect or if there are other characters that I've somehow missed.

NumberNameTypeGroup
26AllysonCivillianKSE
32AndreiMilitaryBlack Ops
3BarakaMilitaryCore
50'Butcher' CarlCivillianKSE
41Captain WarlockCivillianKSE
77CarlotaMilitaryKSE
66CarmenCivillianPlague Gang
98CloudMilitaryKSE
6ColeCivillianCore
40Commander AmadiMilitaryKSE
105Commander MortonMilitaryKSE
112ConnorMilitaryComic Book Extras
104'Doctor' DickCivillianKSE
89Doctor FalconerCivillianKSE
37Doctor FischerCivillianKSE
86Doctor StakefriezeCivillianKSE
79Doctor WhuttCivillianKSE
64Dorian The GreyCivillianKSE
13DrakeMilitaryDark Side
54'Eightball'MilitaryKSE
102EmmaMilitaryKSE
117EmpusaCivillianComic Book Extras
51FeydraCivillianKSE
67FinnCivillianPlague Gang
33FionaMilitaryBlack Ops
38FrankMilitaryKSE
25Gavin 'Greaser'CivillianKSE
107Gold Coast GaryCivillianKSE
90GoliathCivillianOrphans Gang
103Hugo HarkerCivillianKSE
56IemonCivillianKabuki Gang
46JennieCivillianOrphans Gang
48Inshish VakMilitaryKSE
82Ix-nix-zikCivillianKSE
1JaredMilitaryCore
29JeanMilitaryBlack Ops
44ClopsCivillianOrphans Gang
113KaneMilitaryComic Book Extras
80KatieMilitaryKSE
39KilgoreMilitaryKSE
30KyleMilitaryBlack Ops
76LaraCivillianKSE
20Lt. GrahamMilitaryKSE
108Lt. Jee-hyeMilitaryKSE
68MacintyreCivillianPlague Gang
88Madame SingletonCivillianKSE
2MagnusMilitaryCore
84Major SharpMilitaryKSE
31MariaMilitaryBlack Ops
19MassimoMilitaryKSE
55MercedesCivillianKSE
15MilesMilitaryDark Side
12MirandaMilitaryDark Side
5MitsukiCivillianCore
78Morty McCallisterCivillianKSE
57NadsukeMilitaryKabuki Gang
53NortonCivillianKSE
52Nura SatarCivillianKSE
58OiwaCivillianKabuki Gang
114OlegMilitaryComic Book Extras
49Ook OokCivillianKSE
65PatCivillianPlague Gang
74'Pink'CivillianKSE
83Preacher KarlMilitaryKSE
116Pro.mo.dMilitaryComic Book Extras
17RadkaMilitaryDark Side
36Rea 'Tank Girl'CivillianKSE
14ReeseMilitaryDark Side
81Richard KindredCivillianKSE
60SamonCivillianKabuki Gang
101Sister Eva DeanCivillianDice Tower KS
34SolomonMilitaryBlack Ops
73'Squirrelly'CivillianKSE
69SydneyCivillianPlague Gang
59InkCivillianOrphans Gang
61TakuetsuCivillianKabuki Gang
43BabyCivillianOrphans Gang
16UmkosMilitaryDark Side
45The WizardCivillianOrphans Gang
47ValCivillianKSE
4VivianCivillianCore
62YomoshichiMilitaryKabuki Gang
115YukoMilitaryComic Book Extras

I've got a second identical box that holds all of the Xenos from the Core set (plus Kickstarter extra Core miniatures.  All of the Workers, Hunters, Tanks, and the pair of Spoiler Abominations fit in the container perfectly.

Thankfully, the boxes are tall enough to accommodate all of the rest of the Kickstarter Abominations and other assorted Xenos such as Flingers, Xenomoths - a 3rd box holds all of those.

Of course, then there is the Dark Side expansion.  A 4th box holds all of the Xenos for that set.  

Yes, the storage volume requirements are a bit larger than a few large Ziploc bags, but I already have painted all of the Core Xenos and as we have established above, throwing painted minis into a bag is simply not acceptable. 😉  These boxes are less tall than the boxes that held the plastic inserts so overall, the space requirements are not much different...assuming I can get myself to throw out the original game boxes...

Zombicide Invader - Peacekeeper Bot


The "Peacekeeper Bot" is available for use by the Heroes in many of the Zombicide Invader core missions.  It felt like a good choice to paint next as it shares many elements with several of the heroes such as the white armor.  Given the list of the upcoming painting subjects, it should prove to be good practice. 

I used the Zenithal Prime technique as I did in my previous posting, the Falchion Turret.  The resulting prime was much more helpful this time as there was a lot more area of dark vs light gradients.  Other than a bit of edge highlighting, I did very little shading of the white armor thanks to the natural underlying gradient combined with the semi-translucent Citidel Apothocary White.  I'm not 100% sold on the contrast colors as there isn't as much control as layering or other more traditional techniques, but I do feel the results are better than my usual tabletop standard (which is the only standard I'm currently capable of attaining 😊).  In my case, that usually amounted to a solid base coat followed by a wash-over-everything.    

The game artwork was once again my guide for painting this miniature.  I was a little confused as to what paints to use for the metal yellowish-gold pieces, but eventually came up with something that I think is acceptable.  

Overall this model was enjoyable to paint despite parts of it seemed to be a bit miscast (namely the right arm socket area) which looks a little cruddy.  In hindsight, I would have tried using Tamiya masking tape and airbrushing the 'racing stripes'.  I think that would have made the stripes look more natural as well as taken less time and concentration.

The various pouches on the Bot's back are another area in which the Zenithal prime really helped out.  After a coat of Vajello's US Olive Drab Air, the natural gradient gave the pouches some natural tonal variation.  I did add a few extra highlights on some of the edges and small areas of pin washes between some of the pouches to help them pop out more, but painting them was very quick.   


Here are the plethora of paints I used on this model:


Next up on the workbench...

Thursday, July 7, 2022

Zombicide Invader - Falchion Turrent


It has been a while since posting any updates here.  I've been busy with a sci-fi terrain project which I'll add a separate posting on.  The terrain project is intended for use in any sci-fi game system, but it was designed with Zombicide Invader in mind.  This short post focuses on the painting of the Falchion turret available in many of the core Zombicide Invader missions.

My plan is to eventually paint all of the models from the Invader Kickstarter which ended a few years back.  

I'll try to stick to the game art when possible for any future models in this series I paint.  For this model, I decided to skip the various flags and other artwork depicted in the rule book just to keep things a bit more simple and less busy looking.


Although it isn't obvious with the results here, I've been experimenting with Zenithal Highlighting using an airbrush instead of the standard white primer from a rattle can.  While this model didn't benefit a lot from the natural shading of this priming approach, the resulting prime from the airbrush is much more smooth and controlled than that of the rattle can.  I didn't take a primed photo, but I used Black Vallejo Surface Primer as the base layer followed by While Vallejo Surface Primer to give the initial highlight layer.

Airbrush Zenithal priming was a fairly easy process and fun to do and I'm planning to follow this approach for all of the characters and machines for Invader.
Here is a shot of the various paints I used.  Looks like a lot for such a simple model, but a few bottles are washes and other extras.  You can see the Rinse Well in the background - a highly recommended tool to add to anyone's painting toolbelt.  Just to the right of the photo, is the Wet Pallete which I also find very useful for miniature painting.


A shot off the workbench and on the game table - surrounded by the sci-fi terrain (which I'll feature in a different blog post).


In many ways, Zombicide Invader is my favorite of the Zombicide series.  If you're interested in picking up a copy, you can check your local game store, get it for a good price at MiniatureMarket if you can find it in stock, or you can find it on Amazon.


I'm not sure how many people read blogs anymore given the rise of YouTube videos over the years, but figured documenting my progress would be helpful to me and perhaps someone else who happens across this page.

Next up on the workbench...


Thursday, October 4, 2018

Intermodal Shipping Containers

Intermodal shipping containers are all over the world and the thought of dozens (or hundreds) of them together on one gaming table sounded pretty awesome to me...  So I started considering options:

Buying O-scale containers or other commercial options are a bit cost-prohibitive as well as would need a bunch of work to get them weathered.  


Another option would be to scratch build the containers using conventional means with card and styrene, but that was quickly discounted given the extreme effort required as well as likely having to sacrifice some level of detail.

Although there is certainly a bit of upfront cost, I went the route of 3D printing my own.  I'll go into more detail about the Phrozen Make resin-based printer I bought last year in another post, but suffice it to say that it is an excellent device which I used to print the containers you can see here.  The Make has been replaced by a newer version called the Phrozen Shuffle, but the quality is about the same from what I've heard.

One part of the original Thingaverse 3D model
To do a quick proof-of-concept, I went out and found an existing 3D model of a container which contained a sufficiently high enough level of detail.  Here is a link to the original model I found over at Thingaverse: Original 3d Model.  I'll skip posting all the other pieces - check it out on Thingaverse if you're interested. 
Plate Laid Out in B9 Creator
I printed out the pieces separately with the intention to simply glue them together at the end.  After messing up the scale a few times, I finally got the pieces to all print out.  Unfortunately, large flat objects printed with resin (at least the resin I used) tend to warp a bit during the curing process.  I took the model into ZBrush and proceeded to join the main body pieces into one model.  As you can see in the screenshot, the main body is printed vertically with the end and doors printed separately next to it.

One problem with the model that I spent a lot of time fixing is that the insides of the pieces are all flat.  By flat I mean the corrugation pattern is not carried through to the inside and instead is just filled with material.  Expensive resin in this case...  Corrugating the insides cut the amount of resin required by half.

The model had other issues as the door was a bit low-resolution as it was intended to be printed on an FDM printer.  I ended up rebuilding the entire door from scratch within ZBrush.

The yellow container pictured above was my prototype.  The steps below are what I ended up with after some experimentation described below.

Here is a photo of a printed body section.  It has been cleaned with isopropyl alcohol via airbrush.  The resin I use is a bit sensitive to submersion in alcohol and tends to split apart if left in a bowl of it for too long.  I've found that 'power washing' it with the airbrush is the way to go.
The end still warped a little bit during curing, but it was easily persuaded to fit together together with the help of Gorilla Glue and some clamps.


The following steps document the painting process I used.

After the back is glued on to the body, I primed in a flat gray spray-can automotive primer.
Next, the second step is base-coating in Burnt Sienna.


Next, areas of Orange Iron Oxide pigment mixed with Burnt Sienna paint were painted on with a sponge brush.  I can't say enough how pleased I am with Earth Pigments.  Very reasonable prices on a great set of products and non-toxic to boot!  I guess wearing a mask is still not a bad idea given any small particulate is not great to breath in.  Anyway, I highly recommend them.

The pigments give some texture to the rust areas.


Here are the primary Earth Pigments I use for adding a rust weathering effect.  Natural Umber, Orange Iron Oxide, Burnt Sienna.


I'm utilizing the 'hairspray' method as I've described in previous blog posts to weather these containers.  After the rust layer has dried, a clear gloss coat needs to be applied.  This is applied via standard rattle-can and allowed to fully dry before proceeding to the next step.  It is important that the clear gloss coat is oil-based to prevent later steps from damaging the rust effects.
The next non-pictured step of liberally spraying the containers with my favorite '80s hairspray: Aqua-Net.  I have the 'regular' and not the 'all weather' version.  I've not tried the all-weather so it may work, but if they made it waterproof in any way, it could cause problems.  Fortunately I stocked up when it was on sale at Walgreens.

Next, after the hairspray has dried, I airbrush 'primer gray'.  It really isn't primer - it is water-based and just called that because real things are often primed with this color of paint.  It is important to airbrush rather than brush this on as the technique won't work if the hairspray gets too wet from the paint being applied over it.


Once the gray overcoat is dried, it is time to get it wet again.  I spray the whole container with water and let it set for a couple minutes.  The water will soak through the gray paint and dissolve the underlying hairspray.  Using a combination of cotton swabs, stiff brushes, dental picks, and scraps of balsa wood to scratch off the gray paint to reveal the rust painting underneath, the desired level of weathering can be achieved in a nice naturally chipped fashion.

I added some additional weathering using the same paints and pigments as above.  In addition, adding a dusting of Natural Umber gives things a 'dusty' look.


After the weathering is complete, it is time for decals.  This was my first real experience with applying decals (other than with a model airplane or two decades ago).  For this, I used a Inkscape to create the graphics and printed them on decal paper made for my laser printer.  I carefully cut them out from the paper and used MircoSet and MicroSol setting solutions to affix them to the containers.


Here are a couple photos after the decals have been applied, but not yet weathered.


I learned a lot about what all of the numbers & letters on the containers mean and utilized the algorithm to produce 'proper' numbers that the check-digit works for.  Each container I made has a unique serial number to track it.


Finally, here is a fully weathered version of the container - including weathering of the decals.


There is still quite a ways to go before seeing 100s of containers out on the game board, but this was a fun and interesting project which resulted in a neat detail to add to my existing games.  So far I've completed six containers and they worked great.

They cost less than $5 each for supplies (primarily resin) and I think the detail is pretty good, but there are a lot of steps involved which adds up to quite a bit of time to complete each container.  For now I'm not going to fire up the production line and pound out 94 more of them.  ;)

I do have plans to work on a shipping yard so perhaps I'll be motivated to add a few more containers if the need arises...

If there are any questions on techniques or tools used, please drop me a message.  I'm always happy to share & discuss!