This abomination made it to the top of the painting list, not due to its special ability (other abominations get an extra activation which this one is killed) or to add more variety, but because I really wanted to paint large 'fleshy' areas in oils. The opportunity for blending skin tones larger than the minimal skin areas found on the characters was very interesting to me. In fact, I'm not really looking forward to the extra activation ability as there are already a lot of extra activations for abominations in this game and it has been the cause of most losses.
 Lots more learning on this one! In hindsight, I'm not sure what I was thinking when I picked the pre-glaze colors. Egyptian Violet is an extremely powerful color and a lot more area got covered with it than I intended. After wipe-down and attempting to pull it up to a more pale skin color, I ended up with the no-eyed-multi-horned-walking-purple-people-eater. It was so far off from what I was shooting for and it was disturbing enough that I didn't even take a photo. I quickly added a large helping of Cadmium Yellow Pale Hue to fight with the exceptionally strong Egyptian Violet which resulted in a yellowish-brown and allowed me to wipe off a good portion of it. From that as a base, I was able to create the flesh tones that better represent the game art.
Most of the painting was completed in one evening, but lasted about an hour longer than it should have due to the purple disaster. Once I got things headed in a more desired direction, I was pleasantly surprised with how easy it was to add the subtle veins and super smooth blends around sore-looking areas such as the various cracks and crevices. Getting to a certain level of 'good enough for me' is much easier for me to achieve with the oils, but I've found it is a lot of fun and easy to keep refining various details and it feels like I spend longer painting than I would have with acrylics.
On the workbench photos:
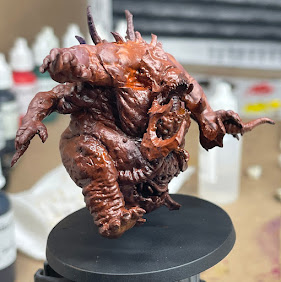 |
| Before the wipe down of the first pre-glaze |
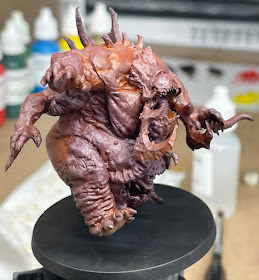 |
| After wiping down the first pre-glaze |
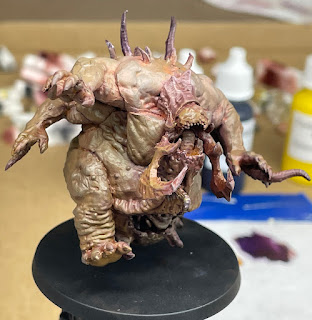 |
| After adding a lot of yellow to counter the purple and wiping as much off as possible |
Trouble with Oils
The Babyface was the first of a group of models that made the unfortunate discovery that the oils were not curing properly. Even after four weeks, touching the red areas resulted in the paint transferring to a sponge. I thought that perhaps the traumatic painting process this model went through somehow messed up the ability for the oils to cure properly, but it turns out at least a dozen more painted are still waiting to cure...
I've tried putting them behind a dehumidifier for several days in hopes the warm-dry air would aid the curing process, but that didn't seem to help. I read that some colors cure much faster when in the sunlight so I've been trying that for the past few days, but it has been cold and overcast most days, but I am hopeful that it will help out and the oils will eventually cure.
In more recent models, I've been mixing a bit of Liquin in with various colors to assist in the curing process and so far the results have been promising. I'm not sure if I've sealed semi-cured models before noticing the problem or if there was some sort of issue that popped up suddenly. The only thing I can correlate is the addition of a few Williamsburg oils (including Fanchon Red used in this model as well as Brilliant Yellow Pale which was used to some extent in all of the models in question. I'll continue to experiment and try to narrow down the issue, but it has been a very disappointing and frustrating experience to what was previously a wonderful oil painting experience.
I eventually wiped off the red areas that were not curing, repainted with Napthol Red + Liquin, and let that cure for a week. There were still some parts of the underbelly that would lightly stain a sponge when wiped so I don't think it will ever cure. I went ahead and just sealed the mini and we'll see if that results in any problems later.
Paints used on this model:
Next up on the workbench:

 Lots more learning on this one! In hindsight, I'm not sure what I was thinking when I picked the pre-glaze colors. Egyptian Violet is an extremely powerful color and a lot more area got covered with it than I intended. After wipe-down and attempting to pull it up to a more pale skin color, I ended up with the no-eyed-multi-horned-walking-purple-people-eater. It was so far off from what I was shooting for and it was disturbing enough that I didn't even take a photo. I quickly added a large helping of Cadmium Yellow Pale Hue to fight with the exceptionally strong Egyptian Violet which resulted in a yellowish-brown and allowed me to wipe off a good portion of it. From that as a base, I was able to create the flesh tones that better represent the game art.
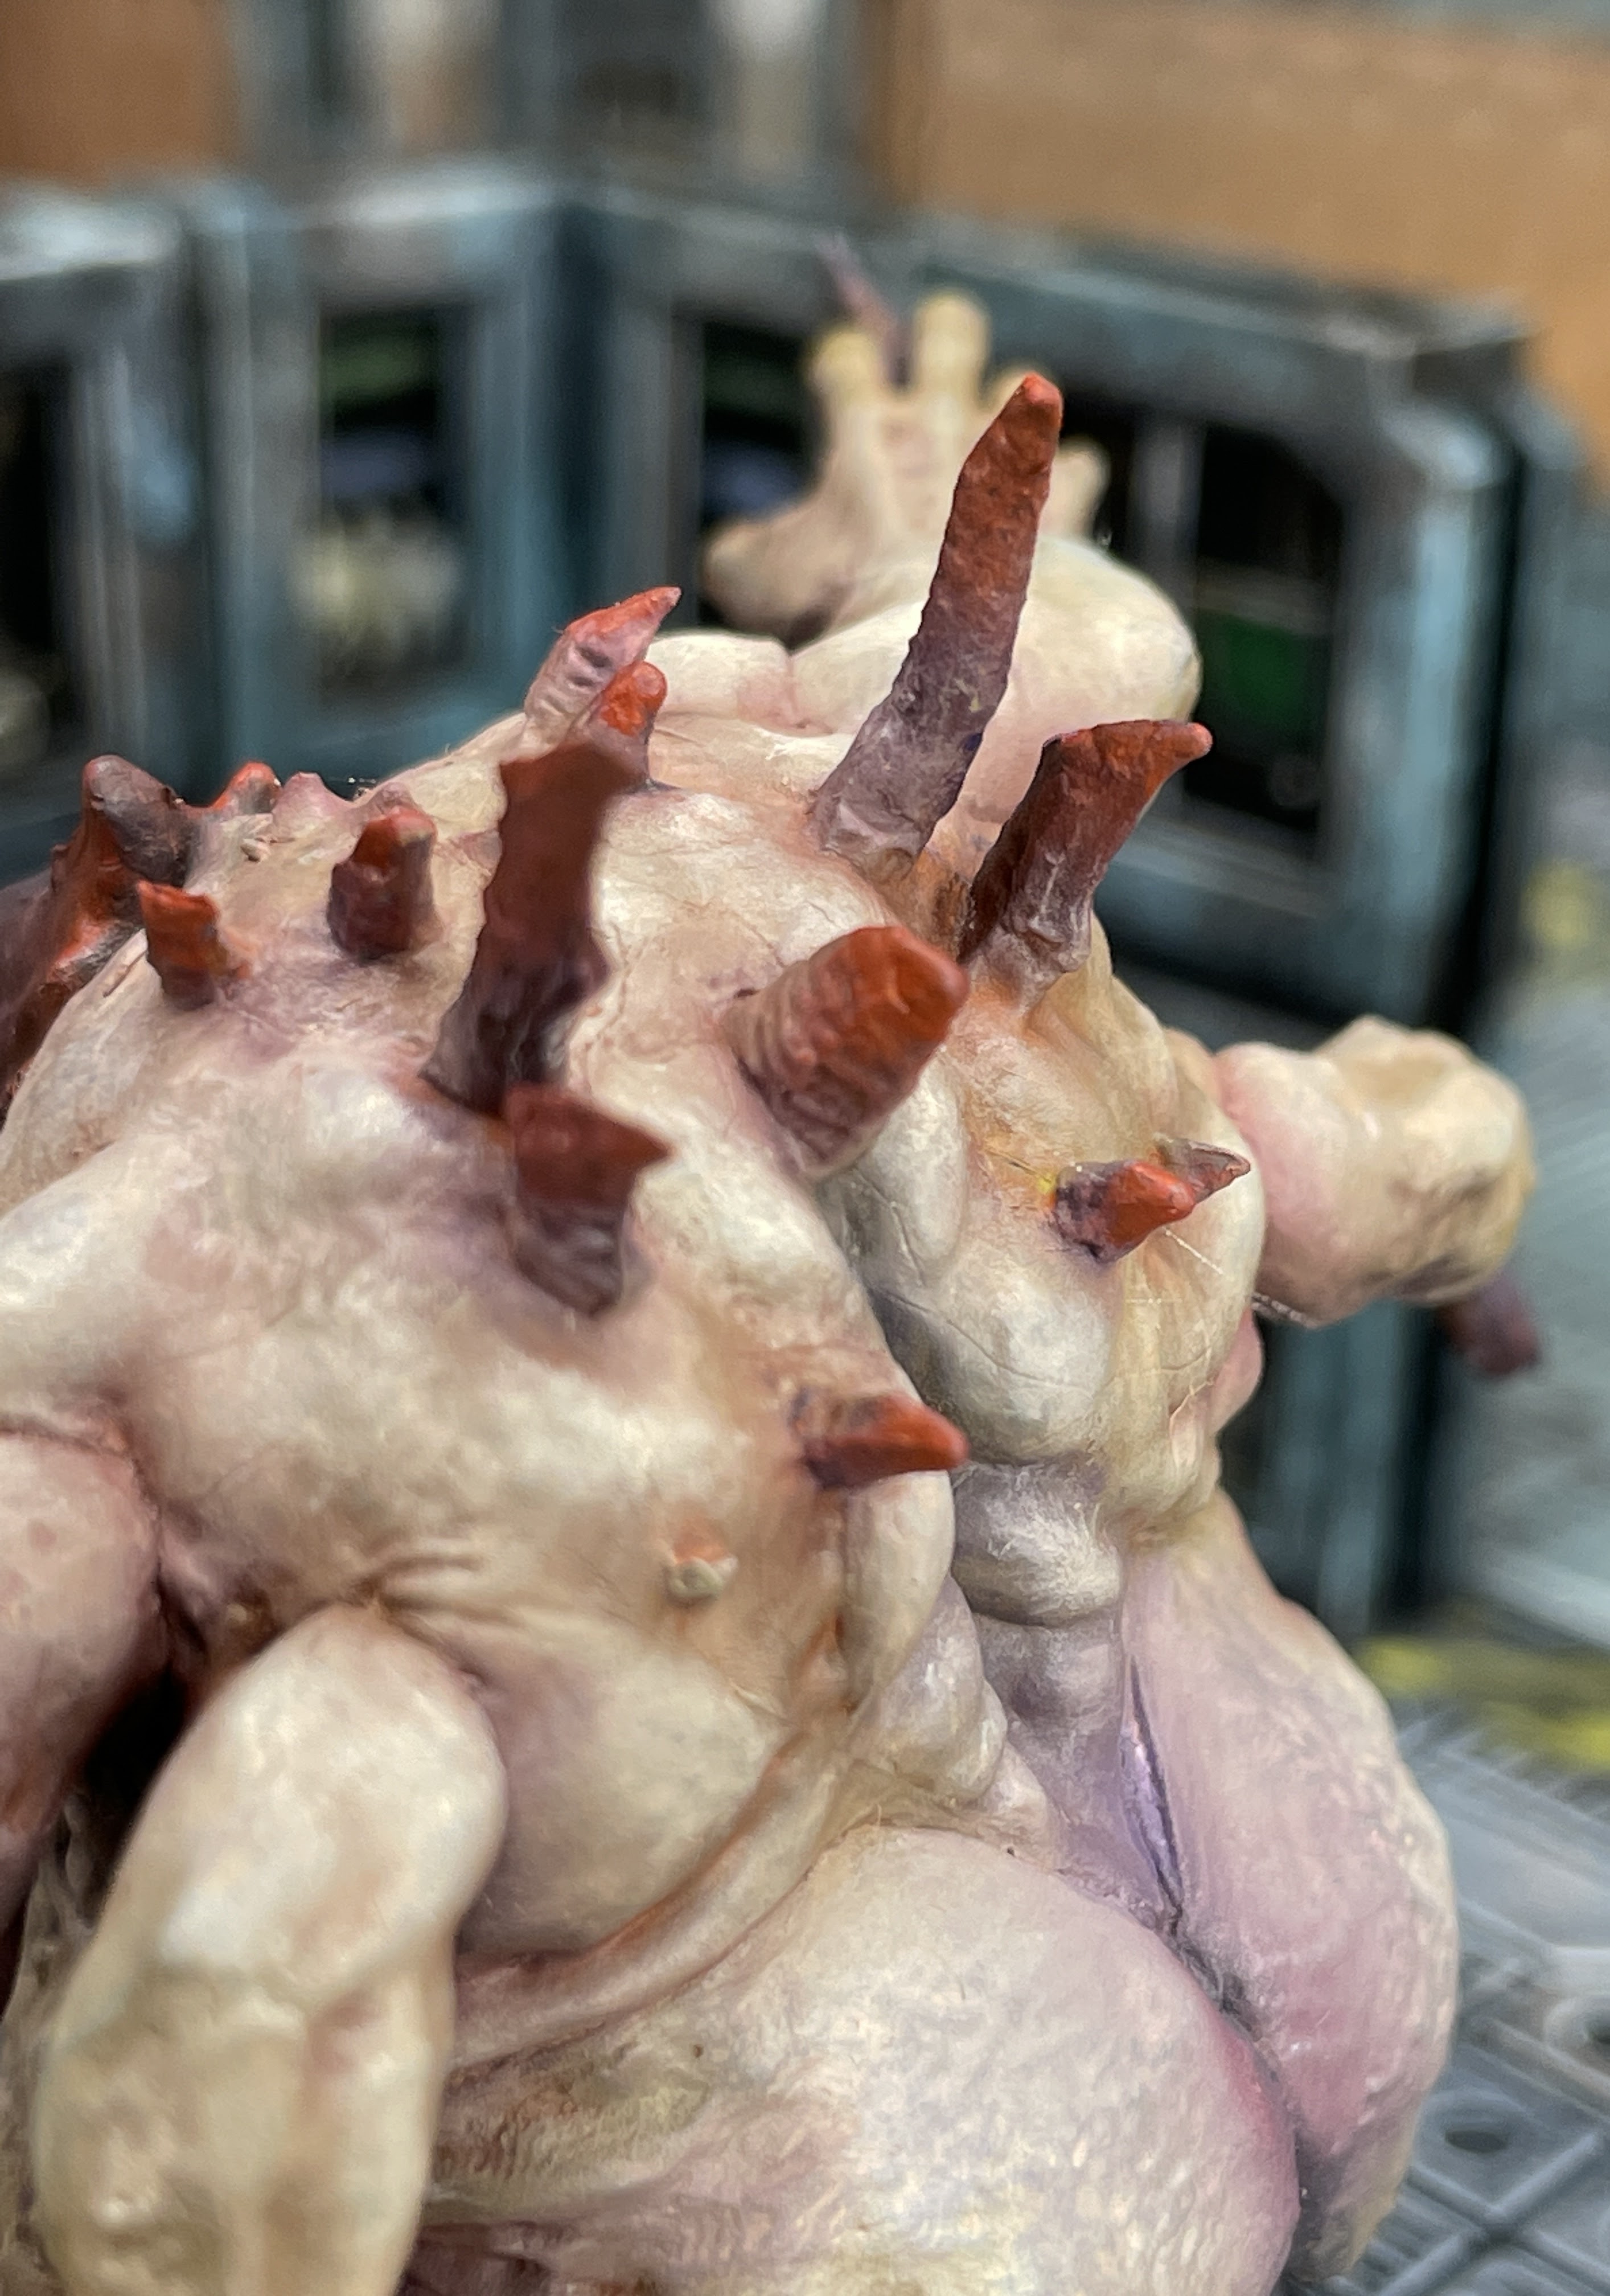


No comments:
Post a Comment